All posts by Denny's Roofing

Understanding Roof Flashing: Why It’s Important for Your Roof System

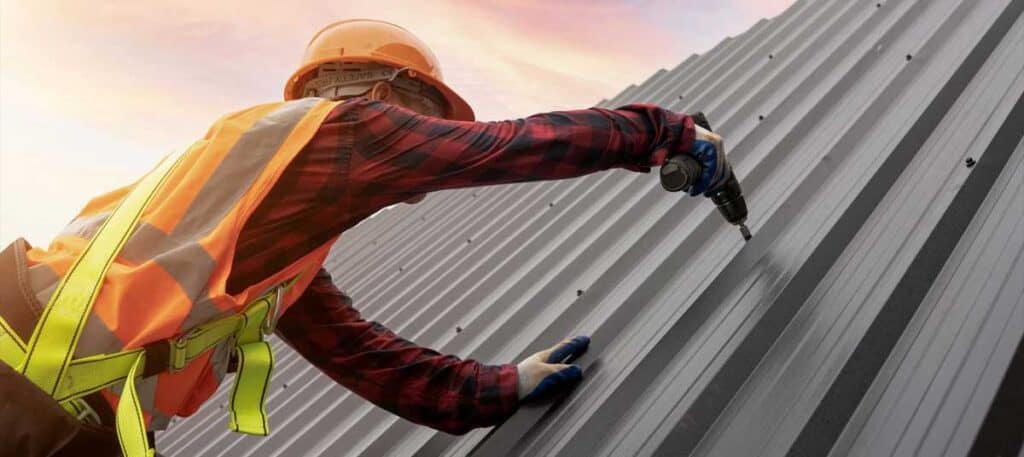
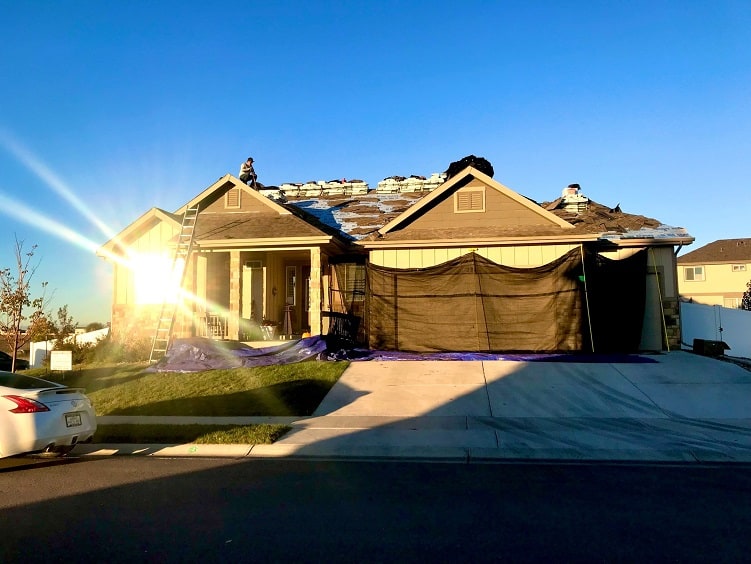
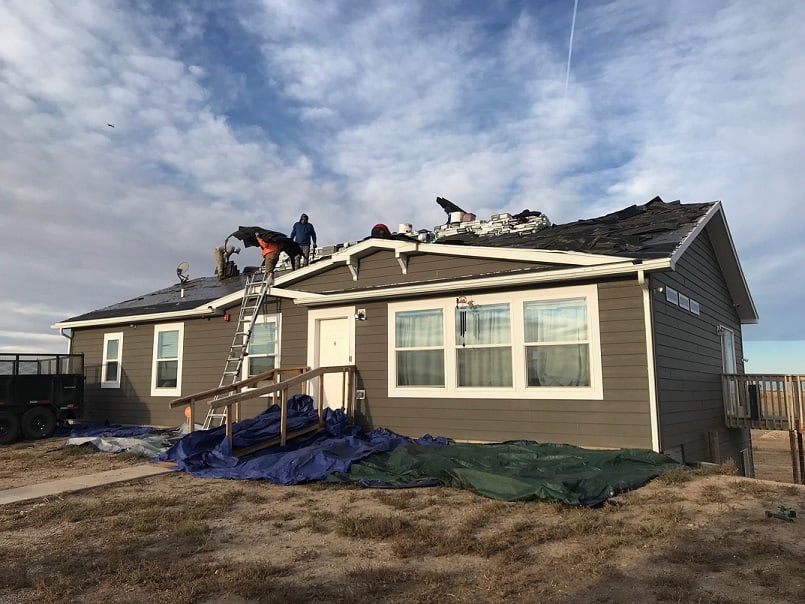
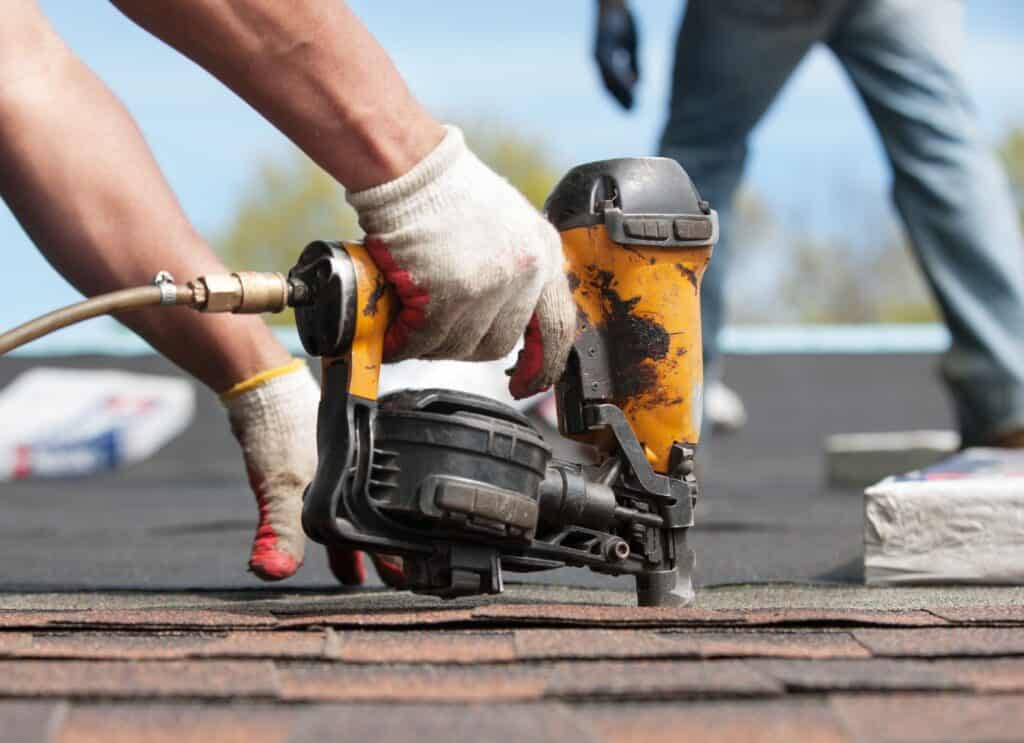
Picture this: you’ve just installed a beautiful new roof on your home. The shingles are sleek, the color is perfect, and your house looks top-notch. But wait—what about those little metal strips that run along the roof’s edges and around chimneys, vents, and skylights?

Roof flashing may not get as much attention as your shingles or tiles, but let me tell you—it plays a pivotal role in protecting your roof from water damage and ensuring its long-term durability. If you think flashing is just a minor detail, think again! An adequately installed flashing system could be the difference between a dry home and a costly, time-consuming leak repair.

In this post, we’re diving deep into what roof flashing is, why it’s so important, and how it impacts the performance of your roof. We’ll also break down the types of flashing materials, common problems with flashing, and how to spot issues before they cause significant damage.

So, let’s flash forward to this crucial aspect of roofing and learn how it keeps your home safe, dry, and dry for years to come.

What Is Roof Flashing?

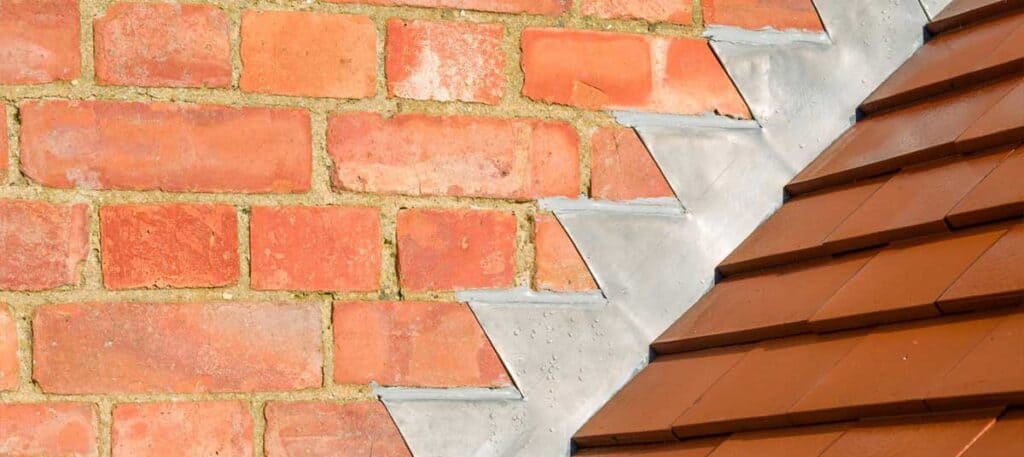
Roof flashing is a thin material—typically metal or, in rare cases, hard plastic—installed around roof openings and seams to direct water away from vulnerable areas. It’s like the unsung hero of your roof, essential for maintaining the overall importance of roof protection. While the shingles and tiles may be the show’s star, flashing ensures that water doesn’t slip in where it’s not supposed to.

Essentially, flashing is used to seal joints and seams between roofing materials and other components of your home, such as chimneys, vents, skylights, and valleys. Flashing’s primary purpose is to prevent water penetration and keep your home’s interior safe from leaks, mold, and structural damage.

Imagine a row of bricks in a wall—flashing acts as a protective barrier between the bricks and the water that could seep through if left unchecked. Flashing helps ensure that your roof holds up against the elements by channeling water away from these critical areas.

Why Flashing Is Crucial for Roof Performance

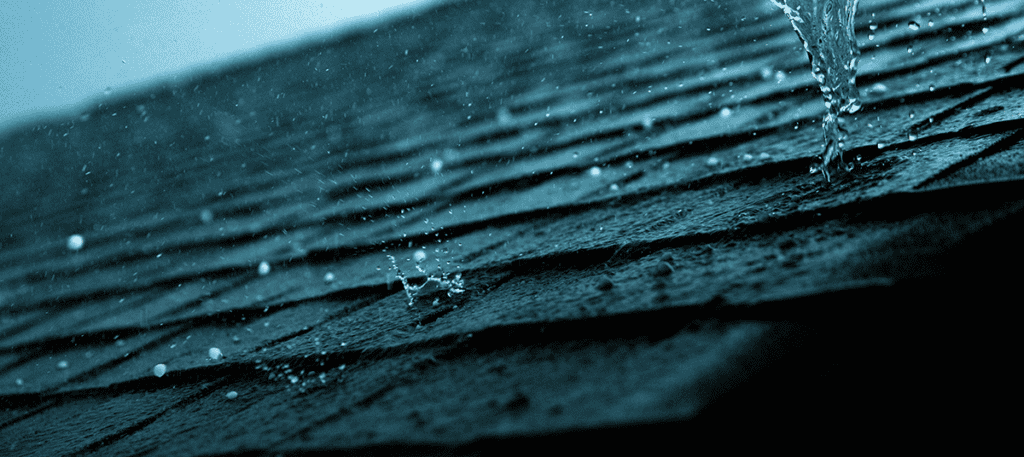
Water is the enemy of any roof. Over time, rain, snow, and ice can compromise your roof’s integrity, especially in areas where roofing materials meet or where penetrations (such as vents, pipe jacks, or chimneys) pierce through the roof. This is where flashing steps in to prevent moisture from creeping in.

The flashing system is your roof’s first line of defense against water damage. Flashing can extend your roof’s lifespan and prevent costly repairs if installed and maintained correctly. Water can infiltrate your home without blinking through seams, joints, and penetrations, leading to leaks and water damage. The worst part? Roof leaks can be sneaky—what looks like a minor issue on the surface can often be masking more significant problems hidden underneath, affecting the integrity of your roof.

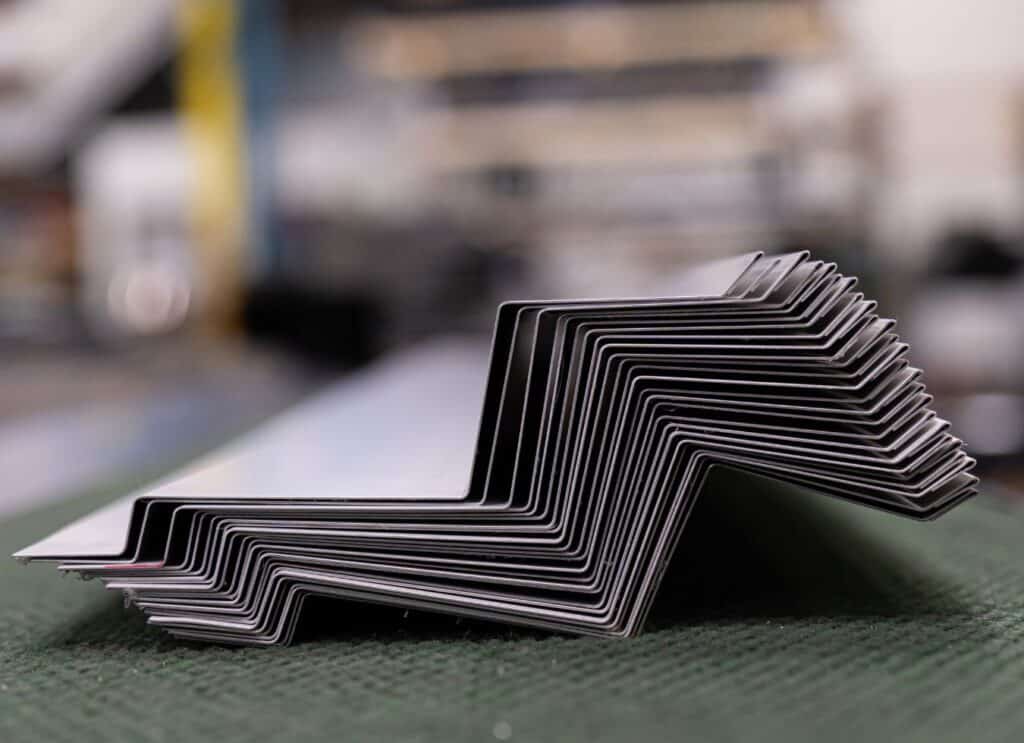
Types of Flashing Materials and When They’re Used

Flashing comes in different materials, each suited for different roof types, weather conditions, and installation areas. Let’s go over the most common flashing materials and where they are typically used:

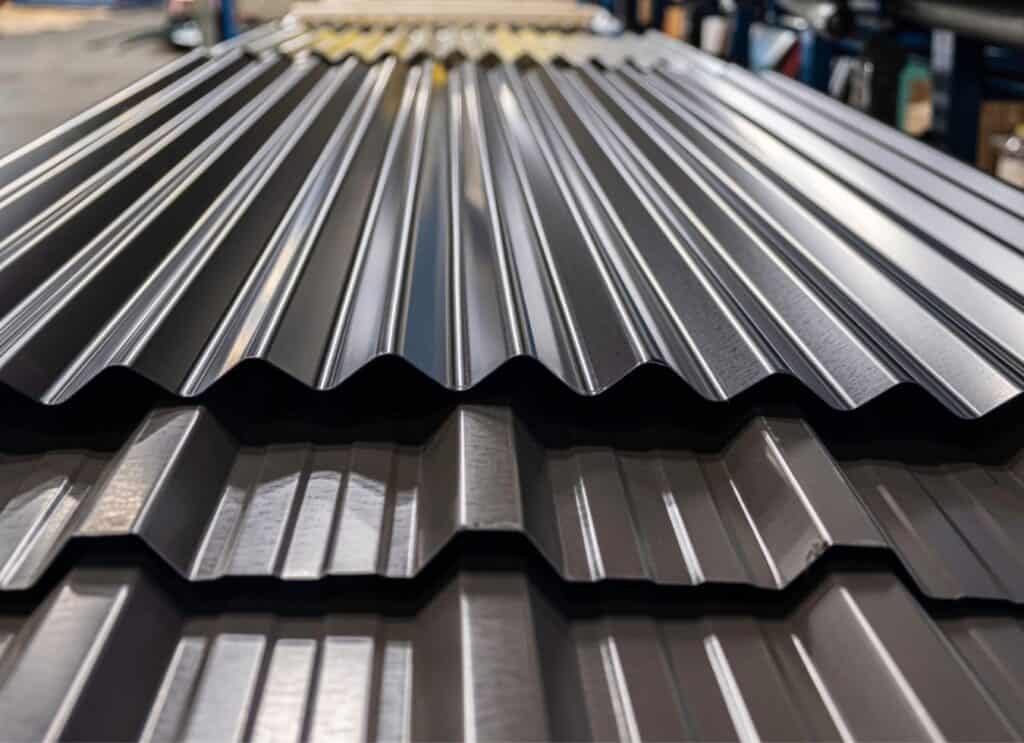
1. Aluminum Flashing (what is used 95% of the time)

Aluminum flashing is one of the most commonly used materials for roof flashing. It’s lightweight, easy to work with, and corrosion-resistant. Aluminum is an excellent option for areas with moderate climates, as it holds up well against rain and wind. However, it’s not the best choice in coastal regions with saltwater exposure, as it can corrode over time in harsh conditions.

Best for: Flashing around vents, skylights, chimneys, and roof valleys. Our go-to material.

2. Copper Flashing (for higher-end custom builds) is popular among roofing contractors for its durability and aesthetic appeal.

Copper flashing is known for its durability and long lifespan. It’s an excellent material for high-end homes or areas where long-term performance is crucial. Copper naturally resists corrosion and doesn’t rust, making it ideal for high-moisture areas. Over time, copper develops a beautiful green patina that many homeowners appreciate for aesthetic reasons, but its true beauty lies in its performance as a type of roof flashing.

Best for: Flashing around chimneys, valleys, and other critical areas on high-end or historic homes.

3. Galvanized Steel Flashing (also comes in baked-on enamel colors now)

Galvanized steel is coated with a layer of zinc to prevent rust, which makes it an affordable and sturdy option for roofing projects. It’s stronger than aluminum and more resistant to damage from impacts or heavy snow. However, galvanized steel, like aluminum, is best used in areas without excessive saltwater exposure.

Best for: Flashing around chimneys, vents, and roof valleys in moderate climates.

4. Lead Flashing (not used much in CO any longer)

Lead flashing is often used in older homes or situations requiring maximum durability. Lead is highly malleable, making it easy to shape around complex roof penetrations. While it’s excellent at waterproofing, lead flashing is not the most eco-friendly choice, as lead can be toxic. It’s also heavier than other materials, so it may not suit every roof type.

Best for: Flashing around chimneys and in areas with high moisture or wind conditions.

5. Rubberized Asphalt Flashing (for flat and low slope roofs)

Rubberized asphalt flashing is a flexible, self-adhesive material used in areas where traditional flashing materials may struggle to adhere, like around irregular roof penetrations or in extreme weather. It’s also very effective at creating a waterproof seal, which is ideal for low-slope or flat roofs.

Best for: Flat roofs, areas with irregular roof shapes, or areas prone to standing water.

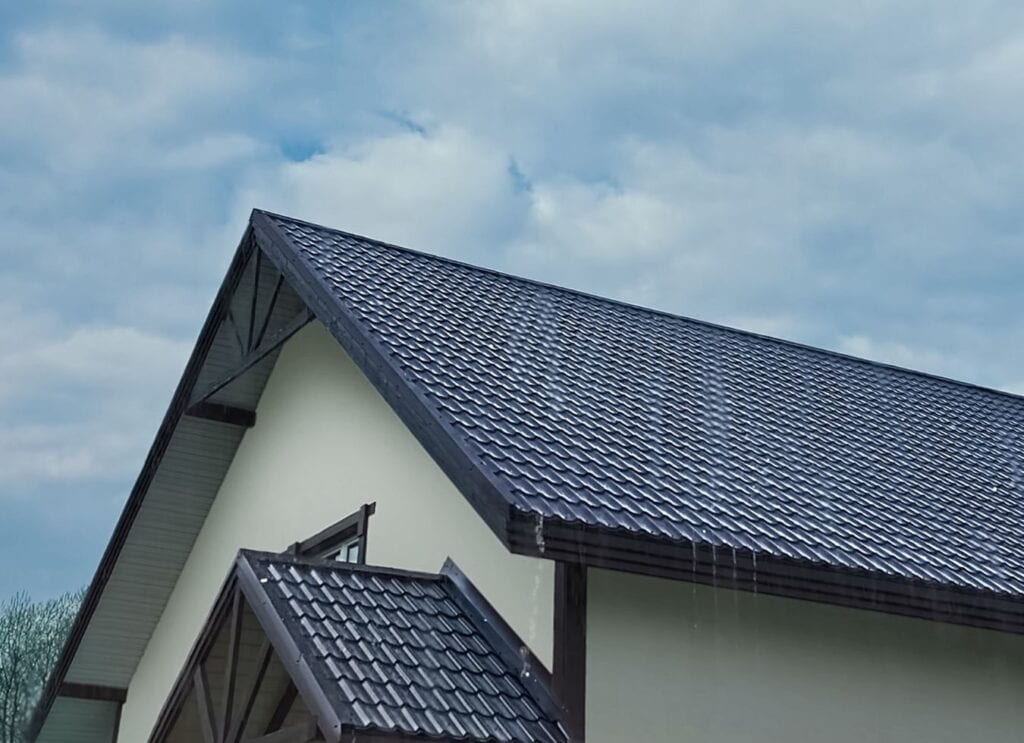
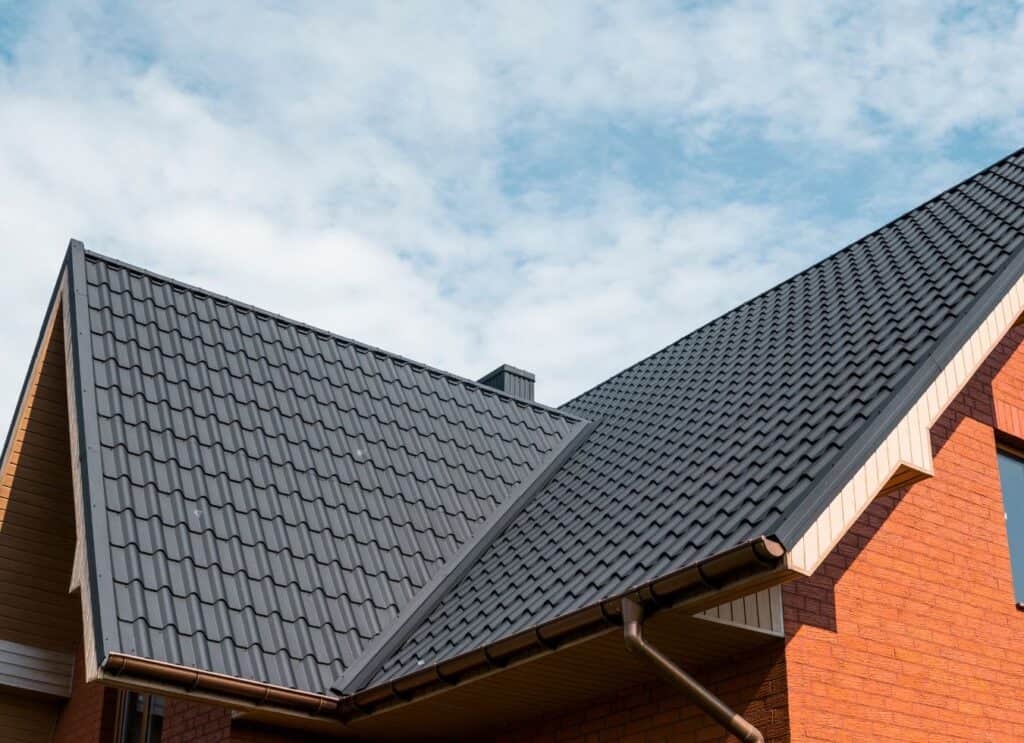
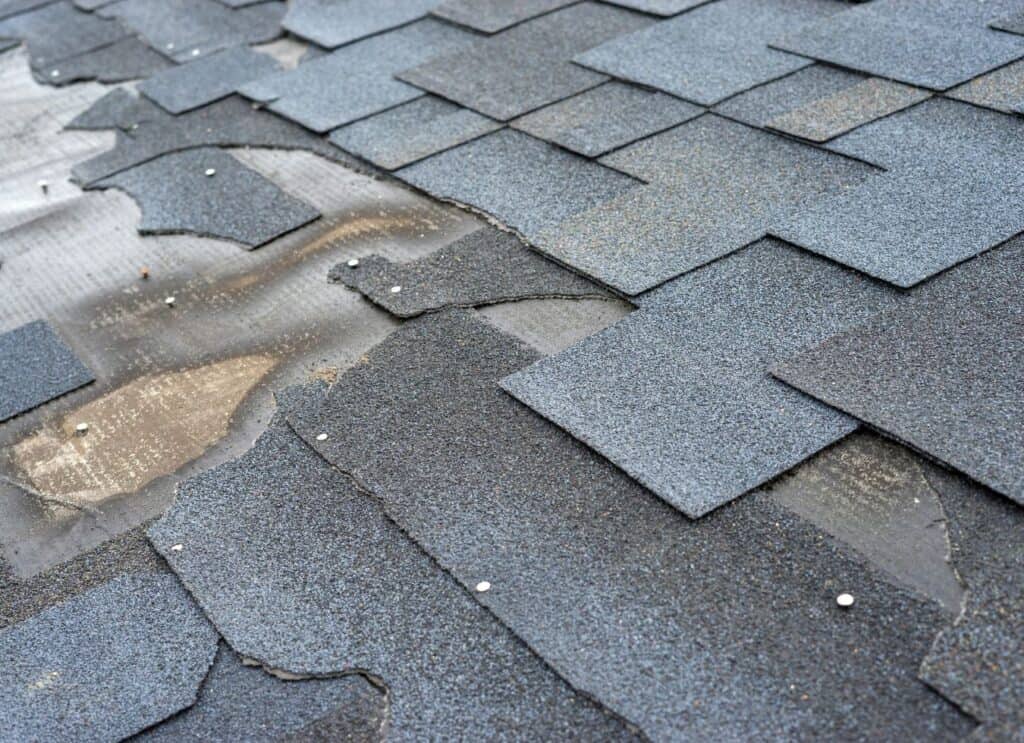
How Damaged or Improperly Installed Flashing Can Lead to Leaks

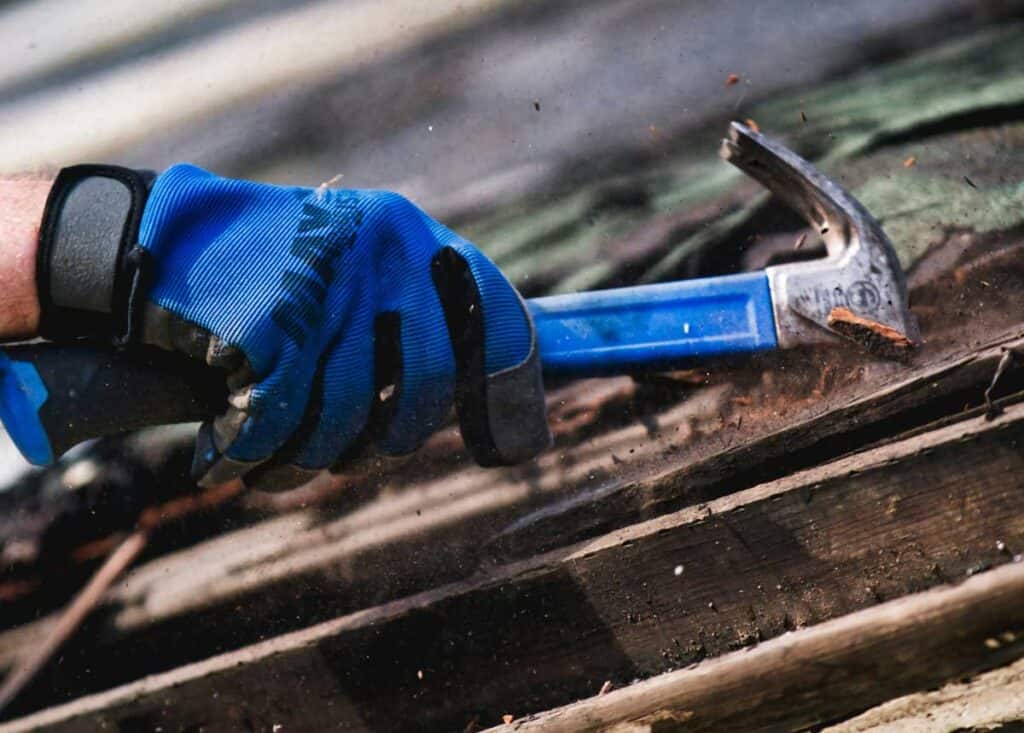
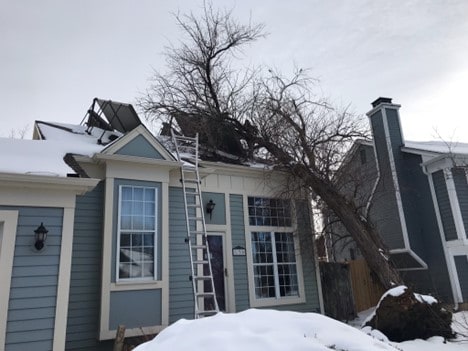
Flashing is a small but crucial part of the roofing system. If flashing is damaged, improperly installed, or missing altogether, it can lead to some serious issues— roof leaks.

1. Water Penetration

Flashing is designed to direct water away from vulnerable areas. If it’s not installed correctly or damaged over time, water can easily seep under the shingles or tiles and travel into your home. Common leak points are around chimneys, skylights, and roof valleys. These areas are particularly vulnerable.

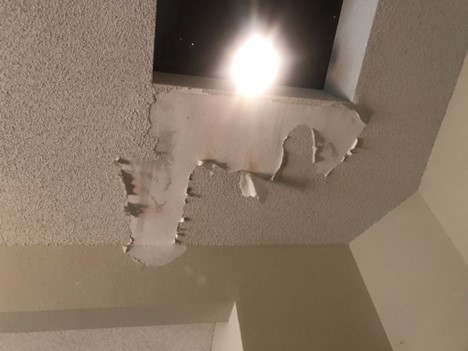
2. Mold and Mildew Growth

When water gets into your roof, it doesn’t just stay in one spot—it can travel down into the walls and attic, where it’s trapped in dark, warm spaces. This creates the perfect breeding ground for mold and mildew. Over time, mold can damage your home’s structural integrity and create health hazards. This is why preventing leaks through proper flashing installation is so important.

3. Roof Decking Rot and Structural Damage

If water continues to leak into your roof, it can damage the decking, insulation, and even the rafters of your home. This leads to rot, weakening the structure of your home and potentially causing expensive repairs, making timely roof replacement vital. Flashing that’s not in good condition will accelerate this process.

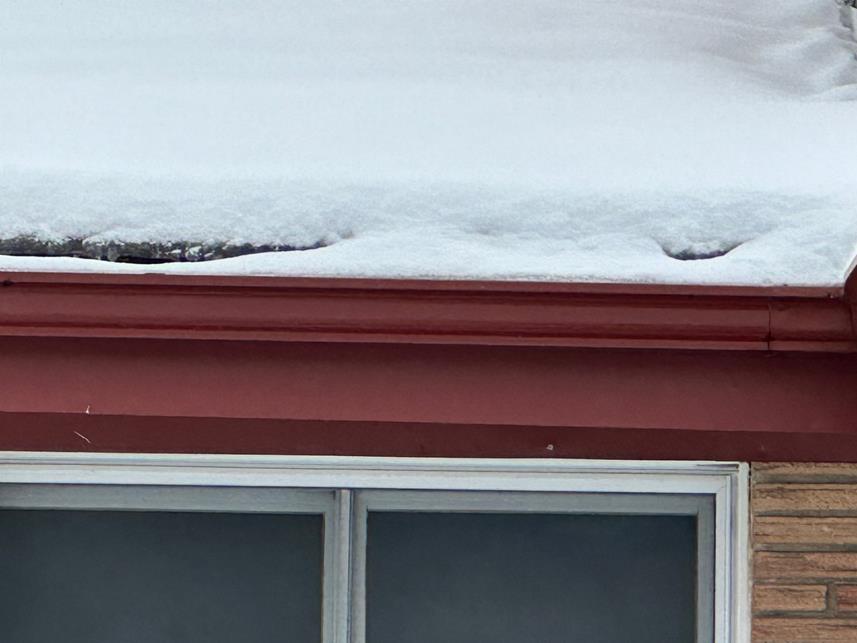
4. Ice Dams (on Eaves and Rakes)

In colder climates, ice dams can form when melting snow refreezes along the edges of your roof. Improperly installed flashing can exacerbate this problem, leading to water backing up under the shingles, necessitating a roof replacement. This trapped water then leaks into your home, causing damage to both the roof and the interior of your house. Keeping flashing properly sealed can help prevent ice dams from forming in the first place.

Common Flashing Issues and How to Spot Them

Now that we’ve discussed the importance of flashing and how damage can lead to leaks, let’s discuss the common flashing issues to look out for and how to spot them.

1. Cracked or Bent Flashing can severely compromise the integrity of your roof and should be addressed by a qualified roofer.

Flashing is designed to be durable, but it’s not invincible. Over time, flashing can crack or bend due to extreme weather, wear and tear, or poor installation. If the flashing is broken, water can easily slip through the seams and cause leaks, highlighting the importance of roof maintenance.

Signs to look for include gaps between flashing and shingles, visibly bent or cracked metal, and areas where water is pooling around the flashing.

2. Missing Flashing

Sometimes, flashing can become dislodged due to high winds or poor installation. If the flashing is missing, water has a direct pathway into your home. Even a tiny gap in flashing can lead to big problems over time, mainly if it affects the types of roof flashing used.

Signs to look for include exposed roof penetrations (such as around vents or chimneys), gaps in the flashing around roof seams, and water stains inside the attic or on the ceiling.

3. Rust or Corrosion

Flashing materials like galvanized steel or aluminum can rust or corrode when exposed to moisture over time. If the flashing is severely corroded, it can no longer effectively do its job.

Signs to look for include orange rust on metal flashing, discoloration, or flakes of rust around the flashing areas.

Other Popular Questions We Receive Related to the Importance of Roof Flashing and Different Types of Roof Flashing

Q: What is the role of roof flashing in a roof system?

A: Roof flashing is essential for maintaining the integrity of a roof and preventing water damage. It acts as a barrier preventing water from seeping into vulnerable areas such as chimneys, vents, and roof planes.

Q: Why is understanding roof flashing important for homeowners?

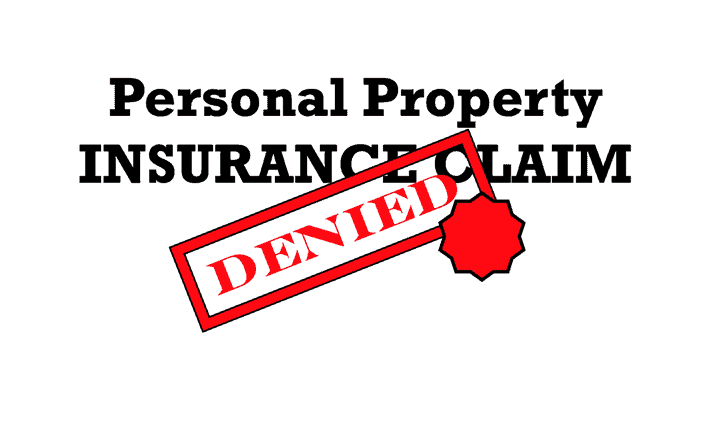
A: Understanding roof flashing is essential for homeowners because it helps them recognize the significance of proper installation and maintenance. Knowing how flashing works can help them identify potential problems before they lead to costly repairs or roof replacement.

Q: When should I consider replacing the roof flashing?

A: You should consider roof flashing replacement if you notice signs of wear, such as rust, cracks, or gaps in the flashing. Additionally, if you experience water damage or leaks in areas where flashing is installed, it may be time for a replacement.

Q: How can I prevent water damage related to roof flashing?

A: To prevent water damage related to roof flashing, ensure that your roof installation includes high-quality flashing materials and schedule regular maintenance and inspection of the flashing. This will help identify any issues early on and maintain the flashing’s effectiveness.

Q: What are the various types of roof flashing used in roofing?

A: Various roof flashing types include step flashing, apron flashing, counter flashing, and pipe flashing. Each type serves a specific purpose and is designed for different areas of your roof to protect against water intrusion.

Q: How can I inspect my flashing to ensure it’s functioning correctly?

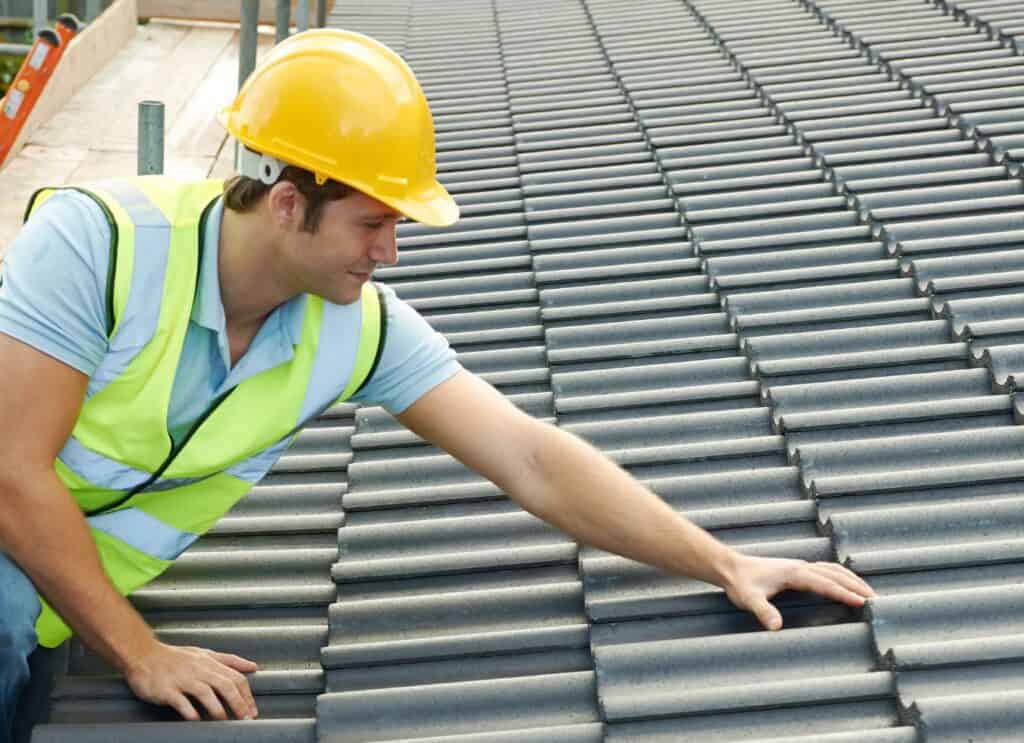
A: To inspect your flashing, look for visible signs of damage, such as cracks or rust. Ensure that the flashing is sealed correctly and that there are no gaps. Regular inspections, especially after severe weather, can help catch any issues early.

Q: What should I do if I need to repair roof flashing?

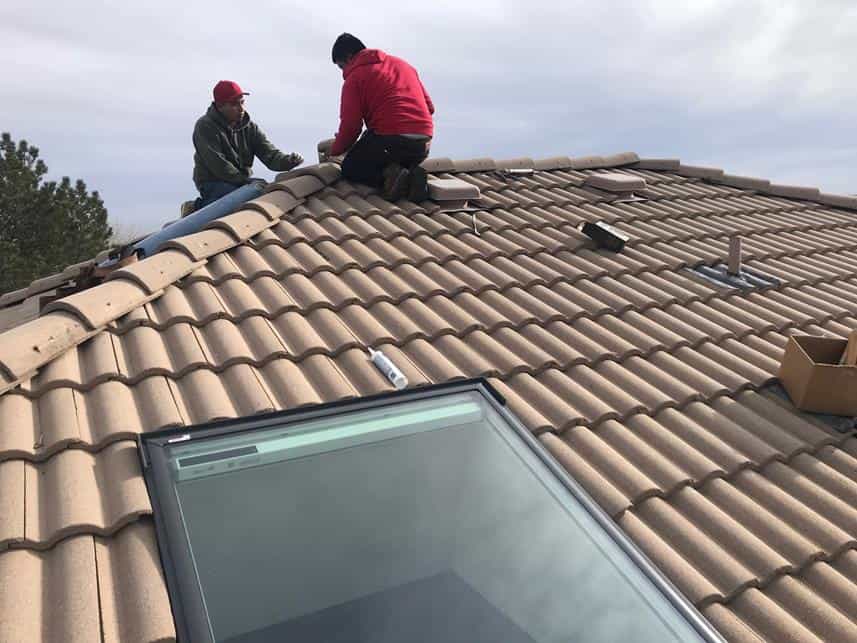
A: To repair roof flashing, consult a qualified roofing contractor or roofer. They can assess the damage and recommend the appropriate repairs or replacement options to ensure your roof system remains watertight.

Q: How does roof flashing contribute to the overall lifespan of a roof?

A: Roof flashing contributes to a roof’s lifespan by protecting critical areas from water intrusion. Properly installed and maintained flashing prevents leaks and water damage, which can lead to more extensive issues and premature roof replacement.

Q: Can I perform roof installation or repair on my own, including flashing?

A: While some homeowners may attempt DIY roof installation or repair, including flashing, hiring a professional roofing contractor is often recommended. They have the expertise and experience to ensure that flashing is installed correctly and meets local building codes.

Q: Where can I learn more about roof flashing and its importance?

A: You can learn more about roof flashing and its importance through roofing industry websites, local roofing contractors, and home improvement resources. These sources can provide valuable information on different flashing materials and best practices for maintaining and inspecting roof flashing.

Conclusion: Don’t Overlook Your Flashing!

Roof flashing is one of those things that often gets overlooked—until it’s too late. A well-maintained flashing system can protect your roof from water damage, extend its lifespan, and keep your home dry and comfortable, underscoring the importance of roof upkeep. On the other hand, damaged or improperly installed flashing can lead to costly repairs, water damage, and mold growth.

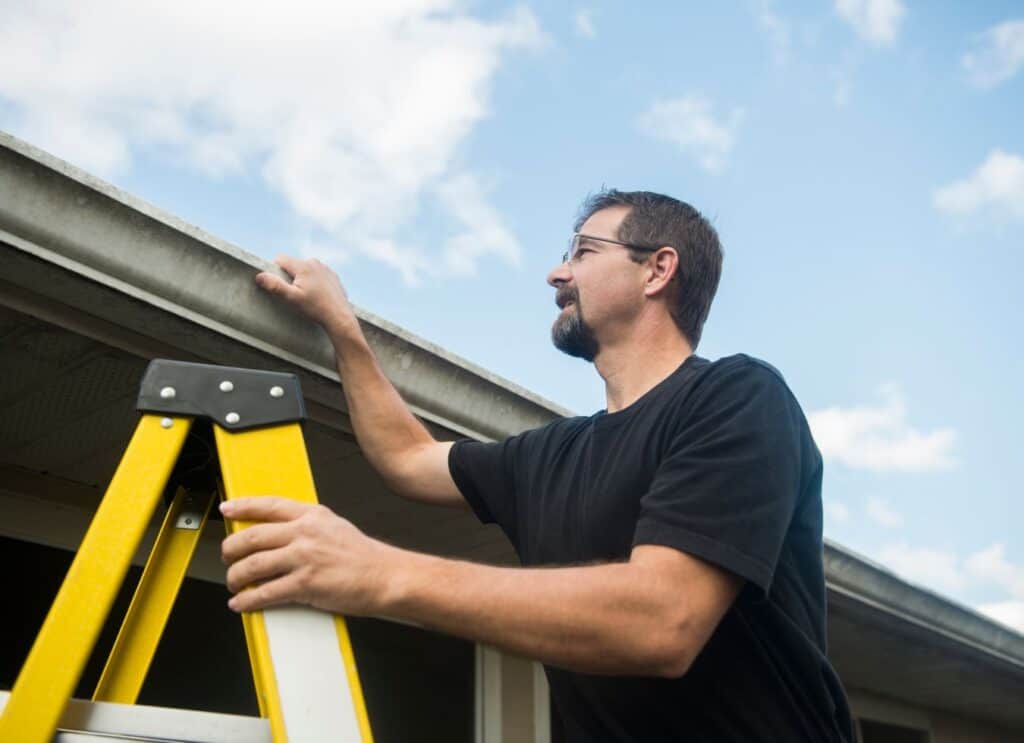
Whether installing a new roof or simply inspecting your current one, pay attention to any signs of damage. It’s crucial to get it as good as possible. If you’re unsure about the condition of your flashing, it’s always a good idea to call a professional like Denny’s Roofing to assess the situation.

Understanding what flashing does and how it impacts your roof’s performance will better equip you to protect your home from leaks and other issues. Keep your roof in tip-top shape, and your house will last longer than industry standards. It’s not that hard.

    Metal Roofing Pros and Cons: 7 Key Factors to Consider for Your Home

    Regarding roofing, most homeowners are familiar with traditional materials like asphalt shingles or tiles. However, over the past few decades, metal roofing has become a serious contender—and for good reason. Whether you’re looking for durability and energy efficiency or want to make a bold statement with a sleek, modern design, metal roofs are catching the attention of homeowners everywhere. But like any home upgrade, there are pros and cons to consider before you leap to metal.

    In this blog post, we’ll break down everything you need to know about metal roofing—from its pros to its cons—to help you decide whether it’s the right option for your home. Let’s get into it!

    What is Metal Roofing?

    Before we dive into the advantages and disadvantages, let’s take a moment to understand what we mean by “metal roofing.” Metal roofing can refer to a variety of materials, but the most common types include:

    • Steel (the most popular option due to its durability and affordability. Especially here in Colorado)
    • Aluminum (lightweight and corrosion-resistant, great for coastal areas)
    • Copper is one popular type of metal used in premium metal roofing. (pristine aesthetic but quite expensive)
    • Zinc (A metal roof is known for being long-lasting compared to traditional shingle roofs. and eco-friendly)
    • Tin (a classic option, though less common today)

    Metal roofing typically comprises interlocking panels or tiles designed to shed rain and snow while providing superior protection against the elements. These roofs are often coated with protective finishes to ensure they last for decades.

    Pros of Metal Roofing

    1. Durability: The Toughest Kid on the Block

    Let’s start with the big one—durability. Metal roofs are known for their long-lasting nature and can withstand some of the harshest weather conditions you can throw at them. A metal roof may be your best friend if you live in a place prone to heavy storms, hail, or high winds. Here’s why:

      • Hail Resistance: Metal roofs are virtually hail-proof, especially compared to traditional asphalt shingles, which can crack or break under the impact of a hailstorm. They do dent when the hail stones are big enough.
      • Wind Resistance: Metal roofing is designed to resist high winds (up to 140 mph or more in some cases), making it ideal for areas prone to hurricanes or tornadoes.
      • Fire Resistance: Metal roofing is non-combustible, meaning it won’t catch fire like wood or asphalt roofing, providing extra protection for your home.

      Metal is an excellent choice for durability, whether you live in a region with extreme weather or want a roof that will withstand the test of time.

      2. Energy Efficiency: Save Money and the Planet

      We all want to save a little money on our energy bills, and metal roofing can help you. Here’s how:

      • Reflective Coating: Most modern metal roofs have a reflective coating that bounces the sun’s rays away from your home, reducing heat absorption. This keeps your home cooler in the summer, reducing the need for air conditioning. Over the roof’s life, this can save you up to 25% on your energy costs.
      • Energy Star Ratings: Many metal roofs are rated as Energy Star products, meaning they meet specific performance criteria designed to reduce energy consumption and environmental impact.

      By installing a metal roof, you’re not only making your home more energy-efficient, but you’re also contributing to a greener planet. Talk about a win-win!

      3. Longevity: A Roof That Can Last a Lifetime

      Most asphalt shingles last between 15 and 30 years. Proper maintenance allows a metal roof to last longer than an asphalt shingle roof—40 to 70 years—and sometimes even longer. This extra longevity is a significant selling point for homeowners tired of dealing with costly roof replacements every few decades. Some metal roofs, like copper or zinc, can last over 100 years!

      This means that when you invest in a metal roof, you’re not just buying a roof for today but for future generations. Plus, the cost of a metal roof can be offset by its long lifespan and minimal maintenance needs. The return on investment (ROI) is excellent, especially if you plan to stay in your home for many years.

      4. Low Maintenance: Less Work, More Play

      Another benefit of metal roofing is it is low maintenance. Metal roofs require less frequent attention than asphalt shingles, which can curl, crack, or be worn down by the elements.

      • No Moss or Algae Growth: Metal roofs don’t trap moisture like asphalt shingles, so there’s less chance of moss, algae, or mold developing. This is especially important in damp or shaded areas.
      • Minimal Repairs: While regular inspections are always a good idea, metal roofs generally require less maintenance than other roofing materials. They’re built to withstand the elements for the long haul.

        With a metal roof, you’ll spend less time worrying about repairs and more time enjoying your home.

        Cons of Metal Roofing

        As with any major home improvement decision, there are a few downsides. However, the benefits of a metal roof often outweigh the disadvantages. Let’s take a look at the most common concerns.

        1. Cost: The Price Tag Can Be Steep

        One of the most significant drawbacks of metal roofing is the upfront cost. While the price has decreased, metal roofing is still more expensive than traditional roofing materials like asphalt shingles.

        • Installation Costs: Depending on your chosen material, metal roofing materials cost between $5 and $12 per square foot. However, the price can rise significantly when you factor in installation costs.
        • Installation Complexity: Metal roofing requires skilled installation. Hiring and hiring cons are crucial to ensure that it’s properly sealed and fastened. Y is crucial. You may also need a specialized contractor, which can add to the overall cost.

          However, it’s important to remember that the long-term savings (due to fewer repairs and increased energy efficiency) often outweigh the initial investment. Plus, if you plan to stay in your home for many years, you’ll get your money’s worth.

          2. Noise: The Pitter-Patter of Rain

          A common concern with metal roofing is the noise. When it rains, snows, or hails, the sound of the water hitting the metal can be loud. Some homeowners find this soothing, but others prefer the quiet hush of a traditional roof.

          Fortunately, modern metal roofs often have insulation layers to help reduce noise. If this concerns you, ask your contractor about soundproofing options for your new roof.

            While metal roofs can be noisy during storms, the added insulation and proper installation can significantly reduce this issue.

            3. Installation Complexity: Not a DIY Job

            As mentioned earlier, installing a metal roof is more complex than installing asphalt shingles. The panels must be aligned, sealed, and fastened to avoid leaks. If you’re considering a DIY installation, think twice. Metal roofing installation requires specialized knowledge and tools.

            Hiring a professional roofing contractor with experience in metal roofs can avoid installation problems and ensure the roof is installed correctly. However, this adds to the overall cost.

              Generally, metal roofs should be installed by professionals who understand the specific type of roofing required. Professionals to ensure long-lasting performance and avoid costly mistakes.

              Is Metal Roofing Right for You?

              Now that you’re armed with all the pros and cons of metal roofing, how do you know if it’s the right choice for your home? Here are some questions to ask yourself:

              • Do you live in an area with harsh weather conditions? A metal roof could offer the durability you need if you’re in a region prone to heavy snow, hail, or high winds.
              • How long do you plan to stay in your home? A metal roof’s long lifespan makes it an excellent investment if you plan to stay for the next 40+ years.
              • Are you okay with the initial investment? While the upfront cost is higher, metal roofing’s energy efficiency and long-term durability make it a wise financial decision.

              Ultimately, metal roofing is an excellent choice for homeowners looking for a durable, energy-efficient, low-maintenance solution that will last decades. While the upfront cost can be high, the long-term benefits are well worth it for many.

              Other Popular Questions We Receive Related To Residential Roofing and Roof Types

              Q: What are the pros and cons of metal roofing?

              A: Metal roofing has several advantages, including durability, longevity, and energy efficiency. It can last 40-70 years, is resistant to extreme weather, and can reflect solar heat, reducing cooling costs. However, it also has some disadvantages, including a higher initial cost than other roofing materials, potential noise during rain, and the possibility of expansion and contraction, leading to fastener loosening.

              Q: What type of metal is best for roofing?

              A: The best type of metal for roofing depends on your specific needs. Steel roofing is popular for its strength and affordability, while aluminum is lightweight and corrosion-resistant. Copper and zinc are also options, known for their aesthetic appeal and longevity. Each type of metal roof has its benefits and drawbacks.

              Q: How much does a metal roof cost?

              A: The cost of metal roofs can vary significantly based on the type of metal, installation complexity, and geographic location. On average, metal roof installation can range from $5 to $12 per square foot, which is higher than traditional roofing materials but offers long-term savings due to durability and energy efficiency.

              Q: What are the benefits of metal roofs?

              A: Metal roofs have many benefits, including longevity, energy efficiency, and resistance to weather conditions. They also reflect solar heat, which can lower cooling costs. Metal roofs require less maintenance than other roof materials and can be recycled at the end of their life cycle.

              Q: What are some common FAQs about metal roofing?

              A: Common FAQs about metal roofing include questions about the longevity of metal roofs, installation processes, and how they compare to other roofing materials. Many homeowners also inquire about the noise level during rain and whether they can install solar panels on metal roofs.

              Q: What is the disadvantage of metal roofing?

              A: Metal roofing has several disadvantages, including a higher upfront cost than traditional roofing materials. Additionally, metal roofs can be prone to denting from hail or falling branches and may require special installation techniques to prevent noise and expansion issues.

              Q: How does a metal roof affect energy efficiency?

              A: Metal roofs can significantly improve energy efficiency by reflecting solar heat, helping keep homes more remarkable in the summer. This can reduce air conditioning energy costs. Additionally, metal roofs’ longevity means less frequent replacements, contributing to overall sustainability.

              Q: What are the pros and cons of metal roofing compared to other roofing materials?

              A: Metal roofing offers superior longevity and durability compared to other roofing materials. However, the initial cost is typically higher than asphalt shingles or wood. Metal roofs are also more resistant to extreme weather conditions, while traditional materials may require more maintenance over time.

              Q: Can I install solar panels on a metal roof?

              A: Yes, you can install solar panels on a metal roof. Many metal roofs, such as standing seam metal roofs, are particularly well-suited for solar panel installation because they allow for easy mounting without penetrating the roof material, which can prevent leaks.

              Conclusion: A Roof That Stands the Test of Time

              Choosing the right roofing material is a big decision. Still, metal roofing could be the perfect option for your home if you’re looking for a roof that offers unbeatable durability, energy efficiency, and a long lifespan. Sure, there are a few downsides—like the initial cost and installation complexity—but the benefits often outweigh these.

              So, whether upgrading your current roof or building a new one, consider metal roofing an investment in your home’s future. After all, a roof is one of the most essential parts of your home, and you want one that will last!

              Have questions? Call Denny’s Roofing, and let’s chat to determine whether metal roofing is the right fit for your home and get you started on your roofing journey today!

              Essential Guide to Filing an Insurance Claim for Roof Damage

              Ah, summer storms may bring much-needed rain to your garden or offer that cozy thunderstorm vibe for a night in, but they can also wreak havoc on your roof. Whether it’s hail, wind, or heavy rain, your roof takes the brunt of the damage when it’s extreme. And once the storm clears, you’re left with a critical question once you know that you have damage: How do I file a roofing claim?

              If you’re feeling overwhelmed at the thought of dealing with insurance, don’t worry—you’re not alone. Filing a roof damage claim after a storm can seem like navigating a maze of paperwork, estimates, and adjuster appointments. But with the proper preparation, a little know-how, and some patience, you can get the help you need to restore your home to its pre-storm condition—and potentially save money.

              In this comprehensive guide, we’ll walk you through the entire process of filing a damage insurance claim, from documenting the damage to working with your insurance adjuster and choosing the right contractor. Let’s dive in!

              Step 1: Assessing the Storm Damage to Your Roof

              First things first: before you even think about picking up the phone, call your insurance company, take a deep breath, and assess the damage. Your insurance claim’s success will rely heavily on how thoroughly and accurately the roof damage is documented. Here’s how you can file an insurance claim for roof damage after a storm:

              1.1. Don’t Rush Out Immediately

              You might be itching to check your roof right away during a storm. However, safety is key. If the storm is still active or there’s a chance of additional weather events, wait until the weather clears, and it’s safe to go outside. Never attempt to inspect your roof during active storms or when conditions are unsafe.

              There… we said it.

              1.2. Look for Obvious Signs of Damage

              Start by inspecting the roof from the ground level. Walk around the house and look for damage. For the roof, you can use binoculars if you have them to avoid unnecessary climbing, or if you have a second story, you can look out the windows that overlook your roof, other windows, siding, and more. Look for noticeable signs of damage like:

              • Missing shingles or tiles
              • Bent or broken metal flashing
              • Dents or cracks in shingles, especially from hail
              • Cracked or missing gutter sections
              • Water stains inside the home, which could signal leaks
              • Broken window panes
              • Hail splatter marks on siding and fencing
              • Paint dents or chips

              1.3. Document the Damage

              Take clear, dated photos from multiple angles to document the damage. Be sure to include:

              • Wide shots of the roof from different angles
              • Close-up shots of damaged shingles, tiles, or metal roofing
              • Any other affected areas, such as gutters or fascia
              • Interior shots showing water leaks (if any)
              • Look at the windows, siding, and paint to see if there is other damage

              Don’t forget to take a few wide shots of your neighborhood. If a storm affected multiple homes in your area, showing that hail damage is widespread can help validate your insurance claim for roof damage.

              Tip: If you can’t safely access your roof or don’t feel comfortable doing so, call a professional roofing contractor like Denny’s Roofing to inspect it. You don’t need to go up there. We Inspect immediately and perform the initial inspection for FREE.

              We will also help document inspection damage with a professional eye and provide an idea of what your insurance company will come up with as a “scope of work” estimate for repairs.

              Step 2: Contact Your Insurance Company

              Once the damage is documented and an expert Project Manager from Denny’s Roofing inspects your roof, we will inform you that it’s time to contact your insurance company. It’s essential to act promptly if you have extreme damage — and many insurers have time limits for filing storm damage claims. Most are at least a year from the date of loss, and State Farm even gives you two years to complete repairs. So, make sure you file your claim promptly after the storm.

              Again, talk to your Denny’s Roofing Project Manager so that they can give you a good idea of when to file a claim. Please don’t do it until you confirm the damage with an expert who knows what to look for.

              2.1. Know Your Policy

              Before you call your insurer, take a few minutes to review your homeowner’s insurance policy if you have it. Look for these key sections:

              • Coverage for storm damage: Some policies may only cover particular storms (e.g., hail or wind).
              • Deductibles: Depending on the policy, you may have a higher deductible for roof damage due to storms. Know how much you’ll need to pay out-of-pocket before your coverage kicks in.
              • Exclusions: Check for any exclusions oration that would prevent storm-related damage from being covered (like wear and tear, neglect, etc.)

              It’s always good to be informed so you know what to expect when talking with your claim adjuster when they come out to inspect their records. If you are unsure what to look for in your policy, you can call your insurance agent, talk to the claims agent, or call us at Denny’s Roofing, and we will explain it all to you.

              We are experts in the insurance claims process. We even have people in our office who only deal with Insurance claims. It’s a daunting process at first, but take one step at a time and contact us so we can help you.

              2.2. Make the Call

              Once you’re ready, contact your insurance company to file your claim. You can typically do this by calling their claims department or using their online portal if they have one.

              When speaking with the representative, be sure to provide:

              • The date and time of the storm (if you don’t know it – your Project Manager will)
              • Your policy number
              • Details about the damage. Be specific. Mention the roof damage you’ve noticed, including missing shingles, cracks, leaks, etc.

              Don’t be afraid to ask questions about the claims process—this is your home, and you want to ensure everything is handled correctly. Ask how long the process will take, what documents are required, and how to schedule the inspection.

              Step 3: Work with Your Adjuster

              After the inspection claim, the next step will be talking with an insurance adjuster from your carrier that will be assigned to your claim. An adjuster is a professional from your carrier who will inspect the damage, assess the cost of repairs, and determine whether your claim is approved. They will document as much damage as they can find. They also miss items that should be included in their initial estimate.

              3.1. Schedule the Adjuster’s Visit

              The insurance company will assign a Field Adjuster to visit your home to evaluate the damage. We highly recommend having a Denny’s Roofing Project Manager at the InsInspection to ensure your insurance adjusts and inspects the damage you and your Project Manager see. It’s good if you are home for the inspection. You can walk through the damage with the inspection manager and answer any questions they may have. And if you can’t attend, Denny or someone on his team will be there to ensure it all goes as it should. You will have expert representation from a licensed roofing company. We promise.

              3.2. Be Prepared to Answer Questions

              When you talk to your adjuster before coming out, they may ask you questions about the storm and the damage to your roof. Be honest and thorough, but keep in mind that they are looking for specific details about the damage, so:

              • Don’t overstate the damage: Only mention what you have documented.
              • Be clear about the storm’s severity: If you live in an area known for hail or wind, highlight the storm’s strength. They will know how damaging the storm was when they get out to look. They will have pulled specific reports and most likely have done other inspections of one of your neighbor’s damage, too. Each home is different because of the materials used on your roof. So, you may or may not be affected just because you see other folks having issues.

              3.3. Understand the Adjuster’s Report

              After the inspection, the adjuster will write a report and inspect your insurance company. This report will include an estimate of the repair costs. You should receive a copy of this report detailing what’s covered, how much the insurance company is willing to pay based on what they have inspected, any exclusions, and any areas that might require what are called “supplements.” These expenses will be added to the claim as your Contractor proceeds with the repairs.

              Tip: If you or our Project Manager disagree with the adjuster’s findings or the estimate seems too low, your Project Manager will see the issue and challenge the decision on your behalf. Don’t be afraid to bring us in to be your advocate as a professional and provide an expert opinion if you haven’t already done so.

              Step 4: Hire a Roofing Contractor

              Once your insurance company has approved your claim, you can officially hire us as your contractor by signing a contract for the specific work and using the Insurance company’s Estimate to make the repairs.
              The fun part begins with choosing the right roofing contractor, like Denny’s Roofing, to fix the damage. The key is finding someone who’s experienced, reliable, and, preferably, already working with your insurance company and a good communicator.

              4.1. Should I Get Multiple Estimates?

              Roofing repairs with an insurance claim differ from regular construction, especially if you have received a recommendation from your Insurance Agent or a friend. Recommended Contractors have been vetted and will do great if you get along with them.

              Please do not hire a door-knocking contractor without doing your homework. Make sure they are local to Colorado and have a good reputation. Storm chasers from out of state come and go. Do not make that mistake.

              Suppose you don’t have someone who highly recommended it. In that case, it can be a good idea to get at least two or three companies to send out representatives who can look at your roof and give you their opinion to get a feel for how they see your claim, especially if you have picked up your contractor off the internet. This gives you a better sense of their process.

              All Insurance claims are paid out at the same rates based on local labor and material costs configured into the estimate. So, getting an estimate after you have received one from your homeowner’s insurance company is redundant. Remember, however, that price shouldn’t necessarily be a consideration—look for a contractor with a solid reputation for quality work and someone who is professional and responsive.

              Your Insurance company fixes pricing. Contractors all get paid the same thing.

              4.2. Work with an Insurance-Friendly Contractor

              Many roofing contractors have experience working with insurance claims. They understand how the process works and can help guide you through it. A good contractor will:

              • Look for vetted sub-contractors (if needed) who are licensed and insured
              • Ensure that your claim is processed promptly so the repairs can be completed
              • Offer an artistry warranty on the new roof

              4.3. Understand Your Deductible

              When you receive the estimate from the contractor and have an RCV policy, remember that your insurance company will typically only cover the cost of the repairs after your deductible is applied. If your deductible is $1,000, for example, and the repairs are estimated at $5,000, you’ll pay $1,000 out-of-pocket, and your insurance will cover the remaining $4,000.

              Not sure… Contact your Denny’s Roofing Project Manager for help.

              Step 5: Finalizing the Claim and Repairs

              Once you’ve chosen a contractor and signed a contract authorizing them as your Roofer/Contractor, they will get a permit from the city or county to begin the roof repairs. Be sure to communicate with your contractor and insurance adjuster throughout the process. After the repairs are completed, you’ll need to have your contractor submit the final invoice to your insurance company to release your depreciation, which the insurance agency has held back to ensure that you completed the majority of the repairs.

              5.1. Review the Final Invoice

              Ensure the final invoice matches the estimate provided and that all the work has been completed to your satisfaction. Go over the line items in the insurance estimate with your Contractor. Once your insurance company receives the invoice, they will pay the remaining balance. They will send you a check that you can then pay your contractor.

              Other Popular Questions We Receive About Roof Replacement and Roof Storm Damage

              Q: What should I do as soon as I suspect roof damage?

              A: As soon as you suspect roof damage, it’s essential to document the damage and contact your insurance company to understand your insurance policy regarding roof damage. This will help you prepare to file a claim if necessary.

              Q: How do I file a roof damage insurance claim?

              A: To file a roof damage insurance claim, document the damage with photos and a detailed description. Then, contact your insurance company to initiate the claim process and provide the necessary information to file a claim.

              Q: What types of roof damage are typically covered under a homeowners insurance policy?

              A: Homeowners insurance typically covers roof damage caused by specific events such as hail, wind, and other natural disasters. However, it’s essential to review your policy to understand the types of damage covered.

              Q: How long must I file an insurance claim for roof damage?

              A: The deadline for filing an insurance claim for roof damage varies by insurance company and policy, but it’s generally advisable to file claims as soon as possible. Check your policy for specific timelines and requirements.

              Q: What can I expect during the insurance claim process for roof damage?

              A: During the insurance claim process for roof damage, an insurance adjuster will assess the extent of the damage and determine the cost value of your roof. They’ll either approve your claim or explain if it’s denied.

              Q: Can I get a second opinion on the damage before filing a claim?

              A: You can get a second opinion on the roof damage before filing a claim. This can be helpful to ensure you have a clear understanding of the extent of the damage and the necessary repairs before you file a roof damage insurance claim.

              Q: What happens if my insurance company only pays the depreciated value of my roof?

              A: If your insurance company only pays the depreciated value of your roof, you may need to cover the difference if you choose to replace your entire roof. Understanding how your homeowner’s insurance policy calculates the depreciated value and what that means for your claim is essential.

              Q: What should I include when documenting the damage for my claim?

              A: When documenting the damage for your claim, include clear photos, a written description of the signs of storm damage, and any estimates you have received for repairs. This information will support your roof damage insurance claim.

              Q: Is filing an insurance claim for minor roof damage necessary?

              A: It may not be necessary to file an insurance claim for minor roof damage, especially if the cost of repairs is less than your deductible. However, weighing the long-term implications and consulting with your insurance company regarding the best course of action is essential.

              Conclusion: A Smoother Roof Claim Process

              Filing a roofing claim after storm damage may seem like a complex and stressful process, but with the right approach, it can go smoothly, especially if you have a licensed roofing company to assist you. By documenting the damage carefully, understanding your policy, and working closely with your adjuster and contractor, you can ensure that your roof gets the repairs it needs— without the possible headaches that can arise.

              Hire Denny’s Roofing to guide you through the process.

              You will be glad you did.

              And remember: storms come and go, but a well-maintained roof is your home’s best line of defense. Regular roof inspections and timely repairs will ensure that your home stays safe, no matter what Mother Nature throws your way.

              Best Roof for Hail Storms: Top Hail-Resistant Roofing Types Explained

              When protecting your home, your roof is truly the MVP. It stands guard against rain, wind, snow, sun, and, of course, hail. If you live in a hail-prone area, you’re probably all too familiar with the anxiety accompanying a thunderstorm during hail season — wondering if today’s weather will leave your roof battered or even seriously damaged. This is a relatively common occurrence here on Colorado’s Front Range.

              Here’s the thing: Not all roofs are created equal regarding hail resistance. Whether you’re replacing your roof after a storm or just looking to upgrade before the next one hits, the material you choose will significantly impact how well your roof stands up to hail. But how do you know the best roofing material for hail-prone areas?

              This guide will compare the top roofing materials—asphalt shingles, metal, and tile—regarding their hail resistance and other essential factors. We’ll also discuss how to choose the right material based on where you live, plus the pros and cons of each material regarding extreme weather. Buckle up! We’re about to dive into the world of roofing materials in a way that’s informative, fun, and, dare we say, a little playful.

              Hail 101: Why Does It Matter?

              Before we get into the materials, let’s quickly talk about hail.

              It’s one of Mother Nature’s more unpredictable challenges, especially during a hail storm. Hailstones can vary significantly, from tiny pea-sized pebbles to golf-ball-sized stones. And every once in a great while… our area gets hit by softball-sized monster hail stones that can cause massive damage.

              According to the National Weather Service, hail causes more than $1 billion in property damage yearly in the U.S. alone. And it seems to be hailing more often because of the jet stream over the Colorado Front Range.

              The severity of hail damage to your roof depends on several factors: the size of the hailstones, the hardness of the hailstones, the speed of the wind, the age of your roof, and the roofing material itself. This is why choosing and investing in hail-resistant roofing material can save homeowners from costly repairs after a hail storm. It is so vital in hail-prone areas. It could save you thousands of dollars in repairs and insurance claims.

              So, let’s explore the three most common roofing materials and see how they fare for hail damage.

              Asphalt Shingles: The Classic Go-To Option

              Hail Resistance:

              Asphalt shingles are one of the most popular roofing materials in the U.S., and for good reason. They’re affordable, widely available, and come in various styles. However, when it comes to hail, they’re not the strongest contender on the block. Standard asphalt shingles typically handle hail reasonably well, but hail damage is standard on older roofs because of the older shingle construction. The shingles may crack or bruise, leading to leaks or the need for repair.

              Class 4 impact-resistant asphalt shingles are designed to resist hail and provide excellent protection. (the highest-rated level for impact resistance) can provide extra protection against hail, with some models even certified to withstand hailstones up to 2 inches in diameter, depending on the hardness of the stone.

              If you live in a hail-prone area and want asphalt shingles, you should look for Class 4-rated shingles. They offer better protection against hail compared to standard shingles.

              We ALSO want to share that some brands of Class 4 Shingles are better than others based on our professional opinion. We have seen it over and over where even though shingles are UL-rated Class 4 IR shingles – when they are placed right next to each other, some perform better than others. Contact us so that we can suggest the best shingles on the market. We like them so much that we are Certified Installers of several shingle manufacturers that we think are the best in the biz.

              Shingle technologies have been changing over the last 10 years and are improving. We can help explain how.

              Pros:

              • Affordable: Asphalt shingles are one of the most cost-effective roofing materials.
              • Variety of Styles: You can choose various colors, styles, and textures.
              • Energy-Efficient Options: Many asphalt shingles are designed to reflect heat, helping to keep your home cooler in the summer.
              • More straightforward to Repair: Asphalt shingles are relatively easy and inexpensive to repair if you do have damage.

              Cons:

              • Hail Damage: Standard asphalt shingles aren’t the most durable in the face of hail. Especially if not rated Class 3 or Class 4 IR shingles, they can crack or dent with larger hailstones, mainly if the impact rating is low.
              • Shorter Lifespan: Asphalt shingles typically last 15 to 20 years, depending on the quality and weather conditions. This is shorter than the lifespan of some materials, such as metal or tile.
              • Environmental Impact: Asphalt shingles are also not the most eco-friendly roofing material, as they are made from petroleum products.

              Best For:

              • Homeowners on a budget who want decent hail protection.
              • Areas with mild to moderate hail conditions still want some impact resistance.

              Metal Roofing: The Durable, Long-Lasting Champion

              Hail Resistance:

              Metal roofing is an excellent choice if you live in a region with frequent hailstorms. Metal roofs are highly durable and can withstand hailstones as large as 2 inches or more without showing much damage. Many metal roofs are rated to resist impact from larger hailstones and strong winds. The smooth surface of metal roofing also prevents debris from settling, which can prevent further damage from future storms.
              The great thing about metal roofing is that it’s available in different styles—standing seam, pro-panel, corrugated, or shingle-style metal—and various colors, so you don’t have to sacrifice aesthetics for strength.

              Pros:

              • Hail-Resistant: Metal roofs are excellent at withstanding hail and extreme weather conditions, including high winds and heavy rain.
              • Longevity: Metal roofs last 40 to 70 years, making them a long-term investment.
              • Energy-Efficient: If insulated correctly, metal reflects sunlight, helping reduce energy costs and keeping homes cooler in summer.
              • Minimal Maintenance: Once installed, metal roofs require little upkeep and are resistant to rust and corrosion.

              Cons:

              • Upfront CostWhile metal roofs last longer, they have a higher upfront cost than other types of roofs, such as asphalt shingles or sometimes tile.
              • Noise: During heavy rain or hailstorms, metal roofs can be noisy. However, this can be mitigated by adding insulation or additional roofing underlayment.
              • Denting: Though hail-resistant, large hailstones or sharp impacts may still cause dents or cosmetic damage to some metal roofing options.

              Best For:

              • Homeowners in hail-prone areas who want durability and longevity.
              • Those willing to invest more upfront for a long-term solution.

              Tile Roofing: The Classic, Beautiful, and Strong Option

              Hail Resistance:

              Tile roofs, especially those made from clay or concrete, are another excellent option for hail-prone areas. They are known for their beauty and durability. However, when it comes to hail resistance, tile roofs are tricky. They can withstand large hailstones, and their thick structure means they won’t easily crack or dent from more minor hail.The downside is that tiles can be more fragile than metal roofs. The tiles may crack or break if hailstones are huge, leading to costly repairs. However, since the underlying roofing structure (underlayment) is still intact, the damage won’t necessarily affect the roof’s overall waterproofing ability.

              Pros:

              • Very Durable: Tile roofs are incredibly long-lasting and can endure extreme weather conditions.
              • Hail-Resistant: Especially clay and concrete tiles, which are built to withstand significant impacts.
              • Energy-Efficient: Tile roofs offer excellent insulation, keeping your home cooler in the summer and warmer in the winter.
              • Aesthetic Appeal: Tile roofing is often more aesthetically pleasing, offering a classic Mediterranean or Spanish-style look.

              Cons:

              • Fragile: While tiles are durable, they can crack under impact from large hailstones or heavy debris.
              • Heavy: Tile roofs are much heavier than asphalt or metal, so your home’s structure may need to be reinforced before installation.
              • Cost: Depending on the type of tile chosen, tile roofs are more expensive than asphalt shingles and may cost more to install than metal roofs.
              • Expensive Repairs: While the underlayment may remain intact, tile replacement is costly and time-consuming.

              Best For:

              • Homeowners are looking for a durable, aesthetic roof that will withstand hailstorms.
              • Those who live in hail-prone areas with frequent or severe storms.

              How to Choose the Right Roofing Material for Your Area

              Choosing the best roofing material for your home depends heavily on your geographic location and the weather your roof will face. Here’s a quick guide to help you choose the right roofing material for hail-prone areas, focusing on their ability to withstand hail impact.

              Consider Your Climate:

              • Hail Frequency: If you live in a hail belt area (think Colorado, Nebraska, Kansas, or Texas), invest in a material that can withstand hailstones as more sive or ficant than half ball.
              • Wind Conditions: High winds often bring hail, so ensure your roofing material can handle gusts. Metal and tile roofs tend to fare better in high winds, and the newer shingle technologies are improving.
              • Temperature Extremes: Extreme heat and cold can crack or damage asphalt shingles and tiles. Metal and tile are better equipped to handle these extreme weather shifts.

              Budget vs. Durability:

              • If you’re on a budget, asphalt shingles (particularly Class 4 impact-rated shingles) can provide good protection at a lower cost.
              • Metal or tile roofing may be worth the investment if you want something that lasts and offers excellent hail resistance.

              Other Popular Questions We Receive Related to Roofing Products and Synthetic Roofing Materials.

              Q: What is a hail-resistant roof?

              A hail-resistant roof is designed to withstand the impact of hailstones without sustaining significant damage. It often has a higher impact rating, such as a class 4 rating, which indicates its effectiveness in resisting hail damage.

              Q: What is the best roof for hail-prone areas?

              A: The best roofs for hail-prone areas include impact-resistant shingles, rubber, and metal roofs. These materials are known for their durability and resistance to hail damage, making them ideal for protecting your roof during hail storms.

              Q: How can I protect my roof from hail?

              A: Consider installing hail-resistant roofing materials like class 4 impact-resistant shingles or metal roofing to protect your roof from hail. Regular maintenance and inspections can also help identify and address vulnerabilities before a storm occurs.

              Q: What is the difference between hail-proof and hail-resistant roofs?

              A: A hail-resistant roof is designed to minimize damage from hail, while a hail-proof roof implies a higher level of protection that can withstand severe hail impacts without any damage. However, it’s important to note that no roof is entirely hail-proof.

              Q: What type of roof is best for hail storms?

              A: The best roofing material for hail storms includes options with a class 4 hail rating, such as impact-resistant shingles, rubber roofs, and slate or tile roofs. These materials are specifically engineered to withstand large hail and help prevent roof damage.

              Q: How does hail damage affect roof repair costs?

              A: Hail damage can lead to significant roof repair costs, depending on the severity of the damage and the type of roof you have. Roofing contractors often assess the extent of the damage to provide an accurate repair estimate, which can vary widely based on the roofing system and materials used.

              Q: What is a class 4 hail rating?

              A: A class 4 hail rating is the highest impact resistance rating for roofing materials. It indicates that the roofing can withstand impacts from hailstones up to 2 inches in diameter, equivalent to the effect of a steel ball dropped from a height of 20 feet.

              Q: Are there any warranties available for hail-resistant roofs?

              A: Yes, many manufacturers offer hail warranties for hail-resistant roofing materials. These warranties can provide coverage for repairs or replacements due to hail damage, but it’s essential to read the terms carefully to understand the coverage details.

              Q: Can slate and tile roofs withstand hail?

              A: Slate and tile roofs are known for their durability and can effectively withstand hail impacts. However, the performance can vary depending on the quality of the materials and installation, so choosing reputable roofing is essential.

              Q: How can I choose the best roofing material for hail?

              A: When choosing the best roofing material for hail, consider the impact resistance rating, durability, and maintenance requirements. Consulting with a knowledgeable roofing contractor can help you evaluate your options and select the best roof for hail-prone areas.

              Conclusion: Roof Like a Pro

              Choosing the right roof material for hail-prone areas is a big decision. It all comes down to balancing cost, durability, and aesthetic appeal.

              Asphalt shingles are an excellent option for budget-conscious homeowners who want reasonable hail protection.

              Metal roofs in some geographic regions can be a GREAT choice.

              At Denny’s Roofing, as insurance companies often recommend durable roofing options, we specialize in helping homeowners navigate these decisions. If you’re unsure about the condition of your roof, we offer free roof inspections to help you make an informed decision. Our team of roofing experts will assess your roof and walk you through your options so you can make the best choice for your home and budget.

              Ready to schedule your roof inspection? Call us at 970-275-4012 or email us at denny@dennysroofing.com. We’re here to help!

              Warning Signs You Need a New Roof: Essential Roof Replacement Tips

              Your roof: the unsung hero of your home, silently working day and night to protect you from the elements. But, like any hardworking feature of your home, your roof doesn’t last forever. Whether you’ve been in your home for years or you’re just starting to notice a few problems, it’s important to know when your roof has reached the end of its life.

              If you’re asking yourself, “Is it time to replace my roof?” — you’re not alone. Many homeowners are in the same boat, unsure whether the issues they’re noticing are signs of normal wear and tear or the need for a full replacement. Here’s the thing: roofs don’t last forever. So, understanding the key signs that your roof is nearing the end of its life is essential. Not only can this help prevent more extensive damage, but it can also save you big bucks in the long run.

              In this post, we’ll walk you through the most common signs that your roof is ready for retirement, share some common roofing issues, and help you understand when it’s better to repair your roof versus when it’s time for a full replacement. We’ll also sprinkle in some humor and real-world advice to keep you informed and entertained along the way. Let’s dive in!

              The Life Expectancy of Your Roof

              Before we get into the specifics of identifying when it’s time for a roof replacement, let’s start with a simple question: How long does a roof actually last?

              The answer depends on several factors, including the type of roofing material, the quality of the installation, and the climate your roof is exposed to. Here’s a quick breakdown of the warning signs you need to inspect your roof.

              • Asphalt Shingles: 20-30 years, depending on the quality (e.g., standard vs. architectural shingles)
              • Wood Shingles or Shakes: 30-50 years (with proper maintenance) Not a good idea to put them on in Colorado any longer because of growing fire danger.
              • Metal Roofs: 40-70 years (great investment for longevity)
              • Tile Roofs: 50-100 years (super durable, but pricey upfront)
              • Slate Roofs: 75-100+ years (if you have a slate roof, you’re living the high life!)

              Now that you know what to expect in terms of lifespan, let’s take a closer look at the signs that your roof may be on its last legs. If it could talk… it would tell you. But since it can’t… here is what to look for.

              Signs Your Roof is Nearing the End of Its Life

              1. Missing or Curling Shingles

              One of the most obvious signs that your roof may need replacing is missing, curling, or signs of roof damage. buckling shingles. Shingles are designed to lie flat on the roof, providing a protective layer against the elements. But over time, they can curl, crack, or fall off entirely. If you notice a few shingles missing or curled edges, that’s an early sign of roof deterioration. A single missing shingle is an easy fix, but if you find that multiple damaged shingles are present, you might need a whole new roof.

              Pro Tip: If you see shingles that are curled, cracking, or buckling, it could also indicate that your roof is showing signs you need a new roof, there’s mold, or that there’s excessive moisture in your attic or under your roof. Either way, it’s a sign that things are wearing out.

              2. Leaks and Water Stains

              Leaking is one of the biggest red flags that your roof needs attention. If you notice water stains or dampness on your ceiling, walls, or attic, it’s a surefire sign that you need to inspect your roof. Small leaks can be a sign that you need a new roof. They can sometimes be repaired, but if the damage is extensive or multiple leaks are present, it’s a clear indicator that your roof needs replacing.

              Water damage can also lead to mold and mildew growth, which can cause health issues and further damage your home. So, if you spot leaks or water stains, don’t ignore them — get a professional roof inspection immediately!

              3. Damaged Flashing

              Flashing is the material around roof features such as chimneys, skylights, vents, and eaves and rakes are designed to prevent water from seeping in around these openings. Rust on the flashing is a warning sign you need to inspect your roof. Over time, flashing can crack, or shift out of place, which compromises the integrity of your roof being protected properly. Damaged flashing can lead to warning signs you need a new roof, like leaks, water penetration, and eventually wood rot.

              If you notice that your flashing is damaged or deteriorating, it’s essential to have it inspected. Depending on the damage, flashing issues can sometimes be repaired, but if they’re widespread, it may be a sign of a more significant problem.

              4. Inspect your roof regularly for any signs of roof damage. Granules in the Gutters

              When asphalt shingles begin to deteriorate, or have been hit by multiple hail and wind storms the protective granules start to wear off. This often shows up as small sand like granules in your gutters, which were once part of your shingles’ protective coating. Granule loss is a sign of aging shingles that have lost their ability to protect against UV rays, rain, and other weather elements. If you notice large amounts of granules in your gutters, it’s time to consider replacing your roof.

              Fun Fact: Those granules you find in the gutters actually help protect the shingles from the sun’s UV rays, just like a hat would protect someone that is losing hair up top. When they wear away, your shingles start to lose their durability because the backing of the shingles are not meant to handle intense UV rays. Having “balding shingles” will also make it hard to identify future hail damage if and when that shows up in a storm down the line.

              5. Sagging or Drooping Roof

              If your roof appears to be sagging or dipping in certain areas, this is a serious warning sign. A sagging roof could indicate that the underlying support structure or decking has been compromised, often due to moisture damage or rotting wood is one of the signs you need a new roof. A sagging roof can lead to complete collapse if not addressed.

              This is not something you want to ignore, so if you spot any sagging or drooping, call in a professional to evaluate the damage and determine if replacement is necessary.

              6. Age of Your Roof

              Even if your roof isn’t showing obvious signs of damage, age alone can be a big factor in whether it needs replacing. As mentioned earlier, most roofs have an expected lifespan of 20-30 years (depending on the material). If your roof is approaching or has exceeded this age range, it’s worth having it inspected to determine if it’s still in good condition or if it’s time for a replacement.

              Tip: If you’re unsure how old your roof is, check with your contractor or look through your home’s inspection reports or past roofing permits that were pulled with the city or county. This can give you a general idea of when your roof was last replaced or repaired.

              How to Decide: Repair or Replace? Inspect your roof to determine the best course of action.

              Now that you’ve checked off some of the major signs that your roof may need replacing, you might be wondering: Should I repair my roof, or is it time to replace it?

              It’s a great question! Here’s a quick rundown of how to decide:

              When to Repair:

              Look for signs you need a new roof before making a decision.

              • Minor damage: If only a few shingles are missing or damaged, repairs may be the way to go. A small leak that hasn’t caused significant damage can usually be patched up with a repair.
              • Localized issues: If only one area of your roof is compromised (e.g., a small patch of damaged flashing), repairs are usually the better, more cost-effective choice.

              When to Replace:

              • Extensive damage: If your roof is riddled with missing shingles, sagging areas, or widespread leaks, it’s time for a full replacement.
              • Age of the roof can be a sign that you need a new roof: If your roof is nearing the end of its lifespan (typically over 20 to 25 years for asphalt shingles), it may be more cost-effective to replace it than to keep patching it up. Often times shingles that old cannot be effectively repaired.
              • Frequent repairs: If you’ve had to patch your roof repeatedly over the years, a new roof will provide more peace of mind and less ongoing maintenance.

              Pro Tip: Always ask for a professional evaluation! A roofing contractor like Denny’s Roofing can give you an honest opinion about whether a repair or replacement is your best option.

              Other Popular Questions We Receive Related to Roof Repair and Replacement

              Q: What are the warning signs you need a new roof?

              A: Warning signs that indicate you need a new roof include missing or damaged shingles, frequent leaks, sagging areas, and signs of water damage on your ceiling or walls.

              Q: How can I tell if my roof needs to be replaced rather than repaired?

              A: If your roof is over 20 years old, has widespread damage, or if you notice significant issues like a sagging roof deck, it may be time to replace your roof rather than repair it.

              Q: What are common signs that it’s time to replace your roof?

              A: Common signs include curling or buckling shingles, granules in gutters, and daylight visible through the roof boards. These indicate that your roof is no longer effective and needs replacement.

              Q: How do missing or damaged shingles affect my roof?

              A: Missing or damaged shingles can expose your roof deck to the elements, leading to leaks and further structural damage. It’s an indication that your roof may need replacement.

              Q: How does a leaking roof impact my home?

              A: A leaking roof can cause water damage to your home’s interior, promote mold growth, and compromise the structural integrity of your roof system.

              Q: When should I start considering a replacement for my shingle roof?

              A: You should start considering a replacement if your shingle roof is nearing the end of its lifespan, typically around 20-25 years, or if you notice significant wear and tear.

              Q: What is the lifespan of your roof typically?

              A: The lifespan of your roof depends on the materials used. Asphalt shingle roofs typically last 20-25 years, while metal or tile roofs can last longer.

              Q: Are there any specific indications that your roof was installed improperly?

              A: Indications of improper installation include uneven shingles, poor alignment, and inadequate sealing, which can lead to early failure and the need for a new roof.

              Q: Can a roof repair be sufficient, or is it time for a new roof?

              A: Minor issues may only require a repair, but if you notice extensive damage, age-related wear, or multiple problem areas, it might be time for a new roof.

              Q: How can regular inspections help in determining if a roof needs replacement?

              A: Regular inspections can help identify early signs of damage or wear, allowing you to address issues before they require a complete roof replacement.

              The Bottom Line: Protect Your Home with a New Roof

              If you’ve noticed any of the signs mentioned above—whether it’s curling shingles, leaking, or just the overall age of your roof—it might be time to consider a replacement. While replacing a roof is an investment, it’s one that can help you need a new roof in the long run. Protect your home from costly damage, increase your home’s value, and provide peace of mind knowing that your roof is in good condition, you may need to invest in a new strong and durable roof.

              At Denny’s Roofing, we specialize in helping homeowners navigate the decision of whether to repair or replace their roof. If you’re unsure about the condition of your roof, we offer free roof inspections to help you make an informed decision. Our team of roofing experts will assess your roof and walk you through your options so you can make the best choice for your home and budget.

              Ready to schedule your roof inspection? Give us a call at 970-275-4012 or email us at denny@dennysroofing.com — We’re here to help keep your roof in top shape for years to come!

              Understanding Class 4 Impact-Resistant Roofing Materials: Why It Matters for Homeowners

              When it comes to your home, your roof is your first line of defense against the elements. Whether it’s the blazing sun, the torrential rain, or the occasional hailstorm, your roof, especially if it features impact-resistant shingles, takes a beating year after year. So, when it comes time to replace or repair that roof, why settle for anything less than the best? Enter Class 4 Impact-Resistant roofing materials – the superhero of roofing options.

              But what exactly are Class 4 shingles, and why should you care? Let’s dive into the world of hail-resistant, long-lasting roofing materials and explore why upgrading to a Class 4 roof might just be the best decision for your home and your wallet.

              What Are Class 4 Impact Resistant Shingles in Roofing?

              At the most basic level, choosing a shingle roof with impact resistance can significantly enhance your home’s protection. Shingles with a Class 4 is the highest rating given to roofing materials in terms of impact resistance in the roofing industry. Class 4 materials, whether shingles, tiles, or metal, are designed to withstand significant impact, like large hailstones, without cracking or losing their integrity. These materials are put through rigorous testing by the Underwriters Laboratories (UL) to ensure they can handle hailstones as large as 2 inches in diameter (roughly the size of a quarter or ping-pong ball), which is roughly the size of a “severe hail” impact.

              Why does this matter? If you’ve ever had a hailstorm leave dents in your roof (or worse, holes and cracks), you know how expensive and frustrating it can be to repair. But with Class 4 impact-resistant materials, your roof can shrug off these storms with ease – saving you on costly repairs and replacements.

              The Benefits of Class 4 Roofing Materials

              1. Hail Resistance

              First and foremost, Class 4 asphalt roofing shingles, tiles, or metal roofing systems are built to withstand the harshest hailstorms. While no roof is completely indestructible, Class 4-rated roofs are significantly more durable than lower-rated materials. This durability is particularly crucial if you live in areas prone to severe weather, such as hailstorms, which are more common than you might think (hello, Colorado and Texas!). It’s why top roofers like us prefer to install class 4 for local roofing projects.

              2. Longevity and Durability

              Because they are designed to handle harsh conditions, Class 4 impact resistance roofing materials tend to have a longer lifespan than traditional roofing materials. Hail, high winds, and other severe weather conditions will cause less wear and tear on impact-resistant shingles, meaning your roof will last longer before needing repairs or replacement.

              Additionally, many of these roofing materials are resistant to cracking, chipping, and fading. This translates to fewer maintenance headaches and better long-term value for homeowners.

              3. Insurance Discounts

              One of the most appealing benefits of a Class 4 roof is the insurance discount that often comes with it. Insurance firms love homes with impact-resistant roofing, and many offer significant premium reductions for homes equipped with Class 4-rated shingles or metal roofs. In some cases, the savings can be substantial – anywhere from Many roofing contractors offer discounts on impact-resistant roofing materials during certain seasons. on your insurance to reduced maintenance costs with a new roof. 10% to 30% Installing impact-resistant shingles can help you save off your homeowner’s insurance premium!

              Why do insurance providers care so much? It’s simple: a more durable roof means fewer claims for storm damage, and fewer claims equals lower costs for the insurer. As a homeowner, you benefit directly from this reduced risk with lower premiums.

              How Does Class 4 Compare to Class 3 Shingles and Other Roof Installation Options?

              So, what’s the difference between Class 4 and other roofing materials? To put it simply, Class 4 is the gold standard in impact resistance and a preferred option for your roofing company. But let’s compare it to other popular roofing options.

              Class 3 Roofing

              Class 3-rated shingles or tiles are still quite strong and provide good protection against hail, but they’re not quite as robust as Class 4 materials – Class 4 shingles are rated the highest, and are designed to take more impact. For example, a Class 3 new shingle roof may be able to withstand hailstones around 1.5 inches in diameter (think golf ball size), which is still pretty impressive, but still not as durable as a Class 4 roof. While Class 3 may be an excellent option for homeowners in regions with less severe hail, it doesn’t offer the same level of protection as Class 4. This is why it’s important to understand the different levels of impact resistance.

              Asphalt Shingles vs. Metal vs. Tile

              • Asphalt Shingles: While asphalt shingles While roof shingles are the most common roofing material, not all asphalt shingles are created equal, especially when considering impact resistance. Regular asphalt shingles are typically not rated for severe hail impact, but certain premium asphalt shingles are engineered to meet Class 4 standards. These shingles often feature reinforced fiberglass, modified asphalt, or special coatings that enhance durability and impact resistance.
              • Metal Roofing: Often paired with impact-resistant shingles, this can be a beautiful and durable option, and many are rated Class 3 or Class 4. Metal roofs are known for their strength and durability, often achieving a Class 4 rating. They are highly resistant to hail, high winds, and fire, making impact-resistant shingles a top choice for homeowners looking for long-lasting protection. Metal roofs are also great for energy efficiency, reflecting heat, and keeping your home cooler in the summer months.
              • Tile Roofing: Clay and concrete tile roofs can be a beautiful and durable option, and many are rated Class 3 or Class 4. Tiles tend to have a longer lifespan than asphalt shingles and are highly resistant to impact. However, tiles can be heavy and may require additional structural support, making them a more expensive option for certain homes.

              Why Insurance Companies Love Class 4 Roofs (And You Should Too)

              As we touched on earlier, insurance companies love Class 4 roofing products because it means fewer claims for them to pay out. Homes with Class 4 roofs are less likely to experience significant storm damage and these shingles can withstand more abuse, which translates to lower overall risk.

              In fact, many insurance providers offer discounts for homeowners with Class 4-rated roofs, knowing that they are investing in durable, high-quality materials that will stand up to severe weather events and require less roof repairs. Some insurers even offer discounts as high as 30% for homes with Class 4 roofs!

              Is a Class 4 Roof Worth the Investment?

              When it comes to the initial cost, Class 4 roofing materials can be more expensive than traditional asphalt shingles, but the long-term benefits often outweigh the upfront investment. With the potential for lower home insurance premiums, fewer maintenance costs, more favorable roof inspection results, and a longer roof lifespan, a Class 4 roof can ultimately save you money in the long run.

              Additional Questions We Often Receive Regarding Shingles and Roofing:

              What are Class 4 Impact-Resistant Roofing Materials?

              Class 4 Impact-Resistant Roofing Materials are designed to provide the highest level of protection against damage from severe weather conditions, particularly hail. These materials, including Class 4 shingles, undergo rigorous impact tests to ensure they can withstand the impact of hailstones without cracking or breaking. This makes them an ideal choice for homeowners looking to enhance the durability and longevity of their roof.

              Why is a Class 4 Rating Important for Homeowners?

              A Class 4 rating signifies that the roofing material has passed the most stringent impact resistance rating tests. For homeowners, this means increased protection against damage, potentially lowering maintenance costs and extending the lifespan of their roof. Additionally, many insurance companies offer insurance discounts for impact-resistant roofs, which can lead to significant savings on insurance premiums.

              How are Class 4 Shingles Tested?

              Class 4 shingles are tested using the UL 2218 standard, which involves dropping steel balls of varying sizes from specific heights onto the roof shingles to simulate hail impact. To achieve a Class 4 rating, the shingles must show no signs of cracking or splitting after the tests, indicating their ability to withstand the impact of severe weather conditions.

              What Types of Roofing Materials Are Available with a Class 4 Rating?

              Several types of roofing materials can achieve a Class 4 rating, including asphalt shingles, metal roofing, and synthetic options. Each material offers unique benefits, such as the aesthetic appeal of asphalt shingles or the longevity and energy efficiency of metal roofing. Homeowners can choose based on their preferences and specific needs.

              How Do Impact-Resistant Shingles Benefit Homeowners Financially?

              Installing impact-resistant shingles can lead to significant financial benefits for homeowners. Besides the potential for reduced repair and maintenance costs due to their increased durability, many insurance providers offer premium discounts when a home is outfitted with class 3 or class 4 impact-resistant shingles. This is because these upgraded shingles are designed to withstand hail, wind, and other severe weather conditions better than standard shingles, lowering the likelihood of costly claims.

              In addition to insurance savings, impact-resistant shingles can also add value to a home. Potential buyers often recognize the long-term advantages of having a reinforced roof, which may translate to a higher resale price. Finally, by reducing the frequency of roofing repairs or replacements, homeowners can save on labor and material costs over time—making impact-resistant shingles a worthwhile investment.

              Why You Should Consider Class 4 Impact-Resistant Roofing

              Whether you’re looking to protect your home from the next hailstorm, save money on insurance premiums, or simply enjoy the peace of mind that comes with a durable, long-lasting roof, Class 4 impact-resistant roofing materials are a smart choice for homeowners. Not only will your roof stand up to the toughest weather conditions, but it can also provide substantial financial benefits down the road.
              So, next time you’re in the market for a roof replacement, consider investing in a Class 4-rated roof. Your home, your wallet, and your insurance company will thank you!

              Roof Certification

              The Importance of Roof Certifications for Home Insurance: What You Need to Know

              Picture this: You’ve just completed a long-awaited home improvement project. Your roof is looking sharp, and weather-resistant, and you feel like you’re finally in the clear. Storms can cause significant damage, so it’s important to have a licensed roof inspector assess your roof. But wait—did you know that a roof certification letter could save you hundreds of dollars on your home insurance premiums? What necessary repairs might be needed after a storm? That’s right, and your roof could be the golden ticket to securing a better rate with your insurance provider after necessary repairs are made.

              In this blog post, we’re diving deep into the world of roof certifications—what they are, why they’re so important for home insurance, and how you can easily get your hands on one from a reputable roofing company. We’ll also walk you through some common mistakes homeowners make when certifying their roofs, so you can avoid costly headaches down the road. Let’s get started!

              What Is a Roof Certification Letter and Why Does It Matter for Insurance?

              A roof certification letter is essentially a formal document that verifies the condition and age of your roof, which is crucial for any insurance claim you may need to file. It’s an official statement that your roof is in good shape and free from any damage that could affect your home’s safety or the longevity of the roofing materials. Think of it as a clean bill of health for your roof—a stamp of approval from a professional roofing contractor that gives insurance companies confidence in the protection your roof provides.

              Why is this important for homeowner’s insurance? Insurance companies need to know that your roof is in good condition and will protect your home in the event of a storm or other natural disasters. Without a roof certification letter, an insurance company may either charge higher premiums, require you to make repairs, or even deny coverage altogether. Insurance companies are risk-averse, so they want to ensure that your roof is up to code and won’t result in costly claims in the future. A roof certification letter proves that your roof can handle the elements, which may help lower your insurance premiums and reduce the risk of future claims.

              How to Obtain a Roof Certification

              Now that we’ve established why a roof certification letter is so important let’s talk about how to actually get one. Here’s a step-by-step guide:

              1. Find a Certified Roofing Professional

              The first step is to hire a certified roofing contractor to assess the condition of your roof and do a professional roof inspection by a trusted roofing company to avoid issues with your home insurance. Make sure the contractor is licensed and insured, as most insurance companies will only accept certifications from qualified professionals. Many contractors, like us here at Denny’s Roofing, offer roof certifications as part of their services.

              2. Schedule a Roof Inspection

              Once you’ve found the right contractor, schedule a time for them to come out and inspect your roof. During the inspection, the contractor will check for a variety of factors, including:

              • Roof age: How old is your roof? Insurance companies are mainly concerned with roofs that are 15 years old or older, as they may need repairs or roof replacement soon.
              • Condition of the materials: Are there any missing shingles, damaged tiles, or signs of wear and tear?
              • Structural integrity: Is your roof still securely attached to the home, or are there areas of weakness?
              • Signs of leaks or water damage: Any evidence of previous water intrusion can be a red flag for insurance companies.

              3. Receive Your Roof Certification Letter from a licensed roof inspector to help with your insurance claim.

              If the contractor determines that your roof is in good condition and can adequately protect your home, they will issue a roof certification letter. This letter will include details about your roof’s condition, the materials’ age, and the roof’s estimated lifespan moving forward. It will also confirm that your roof is up to code and has no significant issues that would compromise its performance.

              4. Submit the Certification to Your Insurance Firm

              Once you have the certification letter in hand, it’s time to submit it to your insurance company. Be sure to send them all the necessary documentation, including the contractor’s details and any other information they may request. If your roof is in good shape, your insurer may lower your premiums or offer you a discount for having a certified, well-maintained roof. It’s a win-win on most insurance policies!

              Common Mistakes Homeowners Make When Certifying Their Roofs

              While getting a roof certification letter is reasonably straightforward, homeowners make some common mistakes along the way. Let’s review a few of them to avoid making these missteps yourself.

              1. Not Choosing the Right Contractor can lead to damaged shingles and unnecessary repairs.

              One of the most common mistakes homeowners make is hiring a non-certified or licensed contractor. It’s essential to choose a contractor who is recognized by insurance and has experience in roof certifications. A certified contractor ensures that your roof gets the proper inspection and that your insurer will accept the certification letter.

              2. Delaying Roof Repairs

              If your roof has minor damage, like a few missing shingles or a small leak, you might be tempted to ignore it or put off repairs. However, this could be a huge mistake regarding getting your roof certified. Insurers are highly sensitive to damage, and even small issues can make it difficult to get certified. If your contractor identifies issues during the inspection, it’s better to fix them before requesting a certification. A certified roof should be in excellent condition.

              3. Assuming Certification Is Only About Age

              While the age of your roof is an important factor in a roof certification, it’s not the only consideration. Even a relatively young roof can have issues that prevent certification if it’s not properly maintained. For example, if your roof has missing shingles, curling edges, or visible wear, it may not pass the inspection—regardless of how old it is. Always make sure that the roof is well-maintained, and don’t just assume that age alone will determine eligibility for certification.

              4. Ignoring Roof Maintenance

              Even after your roof has been certified by a licensed roof inspector, it’s essential to continue regular roof maintenance. Roofs are constantly exposed to the elements, and they can quickly fall into disrepair without proper care. Regular inspections, cleaning gutters, and addressing minor issues can ensure that your roof remains in top shape for years to come. If you let maintenance slide, it could hurt your chances of getting another certification in the future—or worse, it could result in higher insurance premiums.

              5. Not Following Up with the Insurance Provider

              Once you’ve received your roof certification, don’t forget to follow up with your insurance underwriter. Sometimes, they might lose the paperwork or request additional documentation for the repairs needed. Always keep a copy of your roof certification letter and stay on top of the submission process to ensure that you’re getting the discounts or premium reductions you deserve.

              Why Roof Certifications Are Worth It

              In conclusion, getting a roof certification is not just a wise decision—it’s a necessary step for homeowners looking to protect their property and ensure peace of mind. By providing your roof is in top condition and getting it certified, you can lower your premiums, increase your property value, and ensure your home is protected in the event of a storm or natural disaster.

              So, if you haven’t yet gotten a roof certification letter, now is the time to do it. Contact a licensed roofing company to get your roof certified by a qualified roofing professional and start the process today—you might just be surprised by how much you can save!

              At Denny’s Roofing, we make the certification process easy and stress-free, so call or shoot us an email, and let’s get your roof certified for your peace of mind!

              Picking the RIGHT Commercial Roofing Contractor for your HOA or Apartment Complex

              A storm sweeps through your neighborhood and there is obvious damage to your HOA community. You and your neighbors have damage to the exterior of your buildings. The storm was strong enough to cause damage to your roof, gutters, skylights, siding, windows, painting, or even more on your HOA complex. You sit on the board of your small HOA or are an advisor that represents your apartment or condo community and everyone is wondering what to do now. Including you.

              Where do you start?

              “If it is hail or extreme wind damage, call a ROOFING CONTRACTOR because that will be the largest of the trades that will need to get repaired.”

              Well, below are some suggestions on what to do to put things back in order.

              The first thing that you should do is call a professional contractor to come out and take a look at the entire property and get them to assess the damage BEFORE calling your Insurance company. If it is hail or extreme wind damage, call a ROOFING CONTRACTOR because that will be the largest of the trades that will need to get repaired. Any good Roofing Contractor that does residential and commercial projects will handle all of the additional exterior issues too. If they don’t handle the other trades, and you would have to vet a series of sub-contractors… don’t use that Roofer. They are most likely not a Contractor. Jobbing all that out yourself will be a tremendous amount of effort and if you are sitting on the HOA board, or repair committee and not getting paid, trust us when we say, get someone that will be your Contractor and handle all the details.

              If you have a known Contractor that has done work for you in the past, and you have been satisfied with them, you should be in good shape. You have worked with them in the past, you have a track record, and you have a level of trust in them. They took great care of you and did excellent work. You already know who to call. Perfect.

               If you have not already vetted a Roofing Contractor, and a storm hits, or you are not sure about the Roofer that you have used or are interested in looking for a NEW Roofing professional — keep reading.

              There are several things that you can do to make sure they are going to be a good fit for your HOA.

              First, ask for a referral from someone you know in the building industry if you have one.  Ask how they know them… and if they have ever worked directly with them before.

              If you don’t have a good referral source, you can go online and look for a Roofer that is also a G.C. (General Contractor) and can handle ALL of the different trades that need to be completed for your job. Or at least the vast majority of them. This will save you and the HOA board a lot of busy work down the line.

              Next, look for a Roofing Contractor that has an impeccable reputation online with at least 30 to 50 more excellent reviews. They don’t have to be 5-star reviews. As much as you try to make everyone happy, you can’t please everyone all the time. And if they have a few 3 or 4-star reviews, look at their response to the “less than perfect reviews” and see if they offered to make whatever happened – right. Did they work hard to please the client or right the wrong? Especially on the 1-star review. Did they apologize and take responsibility for the situation? Did they explain themselves?  Or did they make an excuse and reply to the review in a “snarky” or even worse, an angry tone?  In construction, sometimes things happen that are out of the Project Manager’s control, and it can be hard to make everyone happy.  But how they respond to adversity and criticism goes a long way. Look for a big “red flag” around how they deal with adversity.  Contractors are professional problem solvers and should have lots of patience on all fronts.

              Next, look at their website to see if they have a strong presence with a website that has some actual information on it that has value. A site that they feel represents them and their company’s personality. If their words on the page are generic and none specific, they most likely will be too.

              You will most likely have a “meh” experience. They will lack the passion to make sure that their jobs are done right. Their website is the front-facing representation of their company. If they are not giving offering up knowledge or pictures of work that they have done, they might not be a good fit. Remember, anyone can say they do a good job and schmooze you enough to get you to sign a contract and get you locked in.  Trust your gut on this aspect.

              Ask for references that you can call and check in on their previous work.  They should be able to give you a list of people willing to sing their praises.  There is a big difference between someone doing a satisfactory or adequate job, and a company that creates excited fans.  You will be in charge of spending a LOT of money on your project.  You want someone that will make you look like a hero at the end of the work.

              This is about this for a second – “companies are people wrapped in a logo.”  Ask specifically who you will be your “point of contact” and have them earn your business. It’s ok for them to jump through a few hoops to earn your trust. Meet with them a few times. Above all, pick someone that you like working with, who is a good communicator and seems to have decent values and a work ethic.  I know that sounds obvious, but you would be surprised. You will be spending a lot of time over the next few months working hand-in-hand with your contractor.  They should be responsive and professional and even-keeled and ON TIME. Someone that does what they say they are going to do when they say they are going to do it. They are professional problem solvers.

              All contractors must be licensed and insured. A license means that he has the proper licensing to work on your type of property (HOA, Commercial Buildings, Apartment Complexes, Flat Roofing, Multi-Family Residential, etc.) Once you see that they have the GC license for your local, make sure that the contractor is adequately insured. It’s not out of line to ask for up-to-date paperwork.  That should not be an issue to get you. It is important that you know exactly what their insurance coverage is. You need to understand if they will cover damages to your property and any other employee liability onsite during the work. You should also ask what is the coverage for the sub-contractors and their employees. When it’s time the contractor will get a building permit to ensure that the work is being done to code with the city or locale where the work is taking place.

              Next, once you have picked a few new companies to call, you know what to ask to vet them and you can also learn a lot about them and the company when they come out and take a look at the damage.

              Once your Roofer gets there to assess the damage, let them walk the property, either on their own or with you, and then let them explain what THEY see that needs attention on your building, and what they think needs to be done to fix it. You will get a chance to see just how observant they are. And if you are still in the vetting process of choosing them as your Contractor, you WANT them to be extremely observant and thorough and explain things to you. It’s important to have someone that sees more than you do, so that things get done right.  They are the expert.  You should be able to depend on their expertise without you having to be the one reminding them.

              Ask lots of questions to qualify your Contractor:

              • Tell me about the repair/replacement process with your company.
              • What is your overall production process? What is your system?
              • If you use subcontractors, tell me about them.
              • Do they have any possible timeline issues to complete the work?
              • What types of materials/brands do you suggest that I can look into?
              • What should I expect around communications with you? Who/How/Why/details?
              • What warranties come with the repair/replacement of the materials and labor?

              Don’t be shy.

              Once they are done and have given you their field assessment, you can also ask the Contractor to explain what you can expect as the next step once you make your decision on who you are going to work with. Don’t let them push you into signing a contract immediately.  A good one never will.

              He might say that they are able to repair things or if there is enough hail damage, they might tell you that the roof needs to be replaced and what is involved in calling the Insurance company, to file for a claim and bringing an Adjuster out and a little about the process from that point on.

              By this point, if you have vetted several companies, you should have enough information to make an informed decision on who you want to hire.

              Once you decide on a Contractor, and let them know, then you can call in a claim and have your chosen Contractor meet with your Insurance Adjuster so that they can help represent your best interest from start to finish.  The Insurance process of a claim is pretty standard as to how the process goes. And the only thing that the HOA will be responsible for will be deductible on the policy.

              Once you get your estimate from the Insurance company, also called a “scope of work,” the process begins.

              If you follow these suggestions on the front end, the actual work itself should happen fairly effortlessly because you will have done a lot of the hard work on the front end of the process.  You are now in good hands with a seasoned professional and the foundation of a successful job has been set.

              If we can help, or you have any questions about our process, or you need a second opinion, do not hesitate to call our Longmont CO office to speak to one of our experts that can help guide you through this process all up and down the Front Range and close mountain towns. 

              My Commercial Roof needs to be replaced. Should I use TPO or EPDM on a flat roof?

              I have a flat, commercial roof on my building in Longmont CO. It needs to be replaced.  Do I ask for an EPDM or a TPO roof?  What is the main difference?

              You have 2 main different types of roofing material for a flat roof on a commercial or even residential building – TPO (Thermoplastic Polyolefin) single-ply membrane roof system or an EPDM (Ethylene Propylene Diene Monomer) synthetic rubber roofing membrane.

              Honestly, there is no easy answer as to which material is better.  They both are durable and cost-effective options for a metal roof, which can be much more expensive. And they both have some good and not as good factors to consider.

              There are several other membrane roofing systems that can be used on a flat roof in certain situations, but in this article, we are going to focus on the pros and cons of just TPO vs EPDM.

              Let’s take a look.

              First, if you have a flat roof on a commercial or residential building, and you are not quite sure if you have an EPDM or a TPO roof system, you can quickly look for a few items on the roof to figure it out. As a general rule of thumb – if your roof is black, it’s most likely an EPDM material.  White would most likely be TPO. Next, look at the “sheen” of the material.  EPDM has more of a matte finish vs a shiny surface for TPO.  You can also tell by actually touching it.  Since EPDM is made of rubber, think of a tire innertube, it’s a little bouncy to the touch whereas TPO is harder and can have a mesh in its layers for strength and is made from plastic.  Lastly, look at the seams. TPO will have seams that are mechanically welded whereas EPDM will have fewer seams because it comes in wider rolls and the seams are glued and taped by hand.

              Let’s start our comparison by saying that under the EPDM or TPO systems, the substructure of the single-ply material is almost identical in how it is built out. So, it really comes down to the choice of surface material.

              Here are several overarching factors that you may want to consider when you are deciding which material to use:

              1. Down to basics: as a roofing membrane – TPO is made from plastic, and EPDM is made from rubber.
              2. Color choice: EPDM is commonly sold only in Black. Other colors can be specially ordered. TPO is primarily white and can be found in grey, tan, and a few additional colors.
              3. Local climate: TPO is a better choice in hotter climate ranges because it reflects the harsh sunlight. EPDM is usually black and holds it heat better during colder temperatures.
              4. Height of the Building: TPO weighs less than EPDM so it has an advantage of a taller building. TPO also has “welded” seams, so it tends to do a bit better with high winds. EPDM is a slightly better choice for roofs close to the ground and is slightly less expensive.
              5. Cost: TPO is slightly more expensive to install and repair than EPDM because of the labor factor.

              TPO vs. EPDM

              Comparing 2 types of Single-Ply Roofing Membrane 

              TPO – has been in the marketplace for approx. 20+ years / EPDM has been used for over 60 years. In the US, TPO’s popularity is building and about 50% of all commercial roofs are now made from TPO.

              TPO is Chemically Adhered along with a hot air “welding” of the seams. Requires electricity to do it. Having the availability of electricity can be an issue in some situations. EPDM is Mechanically adhered with adhesive. Rolled on with anchors and seam tape. Manual Installation and requires no electricity.

              TPO reflects Sunlight so it’s more energy efficient in the summer and hotter climates whereas EPDM retains heat from sunlight. A better choice for cost efficiency for winter and a number of different climates.

              TPO is slightly more expensive than EPDM because of the equipment it takes to “weld” the seams on TPO.  The welded seams tend to last longer in extreme weather and high winds.

              TPO is about 3x more resistant to punctures than EPDM which potentially means fewer leaks with proper maintenance.  But EPDM lasts longer and is slightly more resistant to weathering and has a 60-year track record.

              TPO typically has a manufacturer warranty of 15 to 20 years vs EPDM on average lasts 20 to 25 years. You can get up to a 30-year manufacturer warranty with certain thickness membranes with EPDM. This is climate dependent.

              EPDM can be found in wider rolls than TPO. So that you can potentially have fewer “seams” with an EPDM roof system.

              Also, both TPO and EPDM are manufactured by a number of different companies.  Quality is not always consistent from company to company. Ask your contractor about their opinion on the quality of the material to get the most longevity possible out of your new roof.  They are going to have to stand by the manufactures warranty.  They will know.

              In conclusion, looking at this list of pros and cons for each of the two materials may help you decide what might work best for you based on your needs.

              Be sure to consult with your roofing contractor too.  Since the pandemic, in some areas of the country, commercial roofing materials have been in short supply and certain materials and accessories can be tough to find. Some supply companies are still not getting their regular quotas for their orders met yet.  So, your choice might be limited to the availability of materials.

              As always, do regular inspections and any necessary maintenance and repairs right away to ensure the longevity of your roof so it lasts as long as possible.

              If you need help making the right choice on replacing your flat roof here on the Colorado Front Range.  Give us a call!  We would love to come out and take a look at your roof and help you come up with a plan that is right for you.

              We have years of experience in Commercial and Residential Roofing and we would love to share our expertise with you.

              What can you do when your Insurance company says NO to your storm damage roof claim?

              Here are 7 options that you don’t know about!

              An extreme weather front blows through your neighborhood. After the storm is over, you take a walk around your home to assess it, and you spot some property damage.  Is it enough to call your Insurance company to cover the losses? What’s my current deductible? This is why we buy Insurance… right?!

              What do I do now?

              What is the FIRST step?

              You see damage on some or all of these areas around your home – your gutters, siding, paint, windows, patio furniture, sheds, and more.

              Has your Roof been damaged?  Do you even know what to look for? Most homeowners don’t.

              Relax, the FIRST thing you should do is call a reputable contractor like Denny’s Roofing to come out and put some professional eyes on it to assess the damage to your property and see if it is worth filing an Insurance claim. Meaning, is the damage a lot more than your current deductible? An honest contractor will give a quick assessment and give their opinion on the pros vs cons of calling Insurance to file a claim. If there is a little damage, calling your Insurance company might give you a “ding” to your policy that you don’t want to use if you don’t actually need it.

              You see some damage. It’s there. Your Contractor acknowledges the damage. They feel that it’s worth calling your Insurance Company to get them to send out a “field adjuster” to take a look. You call and have your Contractor there at the meeting to represent you with the Insurance company. The process has started and is in motion.

              Oftentimes, when the damage is obvious, there is no issue with your insurance carrier. They promptly cover the damages, sometimes cutting you a first check right on the spot, so that you can hire your chosen contractor like Denny’s Roofing to start the work. Great.  All is well when the system does what it’s supposed to.

              And it seems like more and more insurance carriers are denying certain coverage or even refusing to cover you at all during the first go around with the adjuster when there is obvious damage. As Contractors, we are seeing this more and more to our dismay. For you the homeowner, it’s got to be very disappointing — you have been paying your premiums for years — you now need their help. What is going on? You have seen all the commercials and it’s drilled into your unconscious that a storm + damage = coverage. But not this time. Why?

              It’s important to know that just because they have refused to cover certain items, it doesn’t mean that they WON’T in the end. It’s just going to take some time for your Contractor to get the coverage for you so that there are funds to fix the issues that are covered in your policy.  It’s not unusual for the initial “scope of work” from the Insurance company to come back a lot less than necessary to cover the damage.

              Sometimes the Insurance company just refuses to cover certain damage because of an internal policy or leadership change, building code changes, or an adjuster that just digs their heels in and refuses to pay certain items based on internal company policy. It will feel a bit arbitrary. That can cause a big issue for the contractor to be able to complete the repairs. There are ways to work around it.

              Ok… now what??

              Well, here are a few things that you can do if this happens to you. Don’t get all worked up over it.  At least not yet. There are a number of things that your Contractor can help with – to get you coverage. We are just getting started!

              1. If your claim gets refused or cuts short monetarily, you will get paperwork from your carrier explaining why.  There might just be an error in the date of the storm or some procedural glitch that needs to be addressed. This does happen and the algorithm makes a mistake.
              2. Most insurance companies use an estimating software tool called Xactimate. It was developed by State Farm to equal the playing field for contractors and adjusters.  The average price for certain work to be done is in a drop-down menu and regularly updated that we all work abiding by.  It’s close to being accurate. It might be a little higher if it is a “bid” item that needs to be approved, and it just gives everyone a similar starting point to write a fair estimate.
              3. You can also call out another “Field Adjuster” with the Insurance Company to come out for a 2nd opinion.  Adjusters are people. Some you get along with, and some you don’t.  The first adjuster might have been having a bad day when they wrote the first estimate and were dealing with a personal life circumstance, and so, their state of mind gave you a poor estimate. It’s totally within your rights to have a reinspect. And even a second one if necessary.
              4. Once the reinspection is done, you can also get your Contractor to document the damage with lots of additional pictures and send them to the “desk adjuster” to look at.  What is a desk adjuster?  You have been assigned someone “in-house” that will look at the field adjuster’s determination and confirm it and also approve all of the “supplementation” that needs to be done after the first estimate. At this point, this person makes the decisions on coverage. They can be very reasonable. If you don’t connect with them, you can also speak to their Manager. The supplementation ends up adding between 5% to 35% or even more to the claim.  Some items on the claim need to be finished and documented before the insurance company will pay for them. And some items will be missed by the initial Adjuster.  This is common.
              5. Ask your Insurance Agent to go to bat for you if they’re in agreement about the coverage issue. Agents usually don’t get involved in the “claims” aspect of the process, and the good ones will if they need to and you can explain your situation. Explain your situation and ask them to call the adjuster to see what the issue is. And then get back to you about it. They don’t have any direct pull with the claims department and when they call claims, it does seem to make a difference.
              6. There is also the option of having a Public Appraiser or Public Adjuster take a look at it and see if there is a discrepancy between what the insurance carrier agrees to put into the claim versus what an impartial appraiser sees. Both sides bring in independent representation, and they make the decision. It’s a bit like arbitration. This is a bit of a longer process, and it can be a very useful tool in the end. We only invoke this when the insurance company is denying coverage.
              7. If you are feeling mistreated by your carrier, the last resort – you can call D.O.R.A. – The Colorado Insurance regulatory agency. If your insurance company is just not treating you well and has broken certain “good faith” agreements, the folks at DORA will look into it. Insurance companies tend to move forward quickly when DORA gets involved.

              The most important thing to remember is to be patient. Getting you covered so that your home can get put back into the same condition as it was before the storm can take time. We know that you would like to get your work done. We want to do it for you. And getting the Insurance companies to acknowledge their agreement to indemnify you is the core of your agreement with the Insurance company.  And hiring the right Contractor that also has the skill and patience to navigate you through that process is key. So, hire wisely.

              Hang in there.  A little patience goes a long way. Especially if you have hired the right contractor to take you through it step-by-step.

              colorado roofs experience all sorts of weather related damage

              Top 5 Roof Damage Issues in Longmont Colorado

              Roof damage is a common issue in Longmont, Colorado, due to the large hailstorms that frequently occur in the area. The Colorado Front Range is called “Hail Alley”. In this article, we will discuss the top 5 roof damage issues in Longmont and how to prevent or repair them.

              hail causes serious damage to shingles and roofs

              Hail damage: Hailstones can range in size from pea-sized to tennis ball-sized, and they can cause significant damage to a roof. Hailstones can dent or crack shingles, causing them to become less effective at protecting your home from water damage. If you suspect that your roof has been damaged by hail, it is important to have it inspected by a professional as soon as possible. To prevent hail damage, consider installing a “Class-4 Impact Resistant” shingle when it’s time to replace your next roof. A little extra cost goes a LONG way in protecting your roof and it can get you a significant discount on your homeowner insurance with your Insurance carrier.

              high winds cause shingle damage and water ingress

              Wind damage: High winds can cause shingles to become loose, fold over, or can be completely torn off of a roof. This can lead to water infiltration and damage to the interior of your home. To prevent wind damage, make sure that your roof is properly secured and that your shingles are in good condition. If you notice any loose or missing shingles, have them repaired or replaced as soon as possible. Taking care of the outside of your roof will go a long way in protecting the inside of your house. The newer shingles that have been developed over the last 10 to 15 years withstand MUCH higher wind velocities than older 3-Tab or T-lock shingles. T-lock shingles are no longer manufactured.  So, if you have them on your roof and have any damage whatsoever Insurance will most likely have to replace your roof. The newer shingles also require 5 to 6 nails on each shingle rather than 4 like the older shingles for the updated wind ratings too.

              water damage on a roof leads to serious repairs if unnoticed

              Water damage: Water infiltration can occur when a roof is not properly sealed or when it is damaged. Water damage can lead to the growth of mold and mildew, which can be harmful to your health and the structure of your home. You might not think of mold and mildew on the Front Range because of how dry it tends to be but once the moisture gets into your attic, it can grow over time. To prevent water damage, make sure that your roof is properly sealed with a regular roof inspection and maintenance every 3 to 5 years. That way, any damage can get repaired as soon as it is discovered.

              Snow melting and refreezing preventing water from draining

              Ice dams: Ice dams occur when snow on the roof melts and then refreezes at the edge of the roof. This can create a dam that prevents water from properly draining off of the roof and gutters. This has been a very common occurrence this Winter. The snow will freeze and get up under the shingle and push back up under the shingle and work its way past the underlayment. This can lead to water infiltration and damage to the interior of your home. To prevent ice dams, make sure that your roof is properly insulated and that your gutters are clear of debris before wintertime comes around.  Get a long “snow rake” to pull snow off the lower areas of the house where ice build-up happens if you have a one-story home.  If you know that Ice Dams are a regular issue, you can also install “heat tape” along the eve of the roof and in your gutters to help it from showing up.

              Squirrels, birds, and raccoons can damage a roof by digging or scratching at the shingles.

              Animal damage: Animals such as squirrels, birds, and raccoons can cause damage to a roof by digging or scratching at the shingles. We see this type of damage all the time during inspections. The animals are trying to get out of the extreme weather. They burrow into any area that is not properly sealed. Even the smallest of open areas on your roof can invite a “critter” to make a nest. This can create openings that allow water to infiltrate the roof and damage the interior of your home. It can also lead to having animals in your attic and up in the roofing structure which can become a major issue. To prevent animal damage, consider installing protective wire barriers on vulnerable areas of your roof, under solar panels, and trimming back any branches that are near the roof. You can also have our roofer secure certain areas of penetration and add extra caulk to points that might seem inviting for animals to enter.  Below is a picture of a home where we did some repairs on the soffit and fascia. The metal plates were the homeowner’s attempt at covering the holes in the siding that a woodpecker kept coming back to over and over again.  You can see at the top of the picture where the birds got into the soffits by pulling them back to have just enough of a hole to sneak in and get out of the extreme weather.

              In conclusion, the top 5 roof damage issues in Longmont, Colorado are hail damage, wind damage, water damage, ice dams, and animal damage. To prevent or repair these issues, it is important to have a professional inspect your roof regularly and address any damage as soon as it is discovered. By taking these precautions, you can protect your home and ensure that it stays in good condition for years to come.

              dealing with hail damage to a roof ending up in a re-roofing

              The Top Roofing Systems Ideal in Colorado to Resist Hail Damage

              When it comes to protecting your home from the large hailstones that are common on the Front Range of Colorado, the type of roof you have can make a big difference. In this article, we will discuss the top types of roofing materials that are ideal for resisting hail damage, as well as the advantages, and cost comparison of each roof type.

              Metal roofing: Metal roofing is one of the most durable roofing options available and is resistant to most hail damage depending on the thickness of the metal. It’s also good for heavy snowfall areas too. Metal roofing is available in a variety of styles and colors and can last for decades with proper maintenance and the appropriate underlayment. Additionally, metal roofing is fire-resistant and also energy-efficient, which can lower your cooling and heating costs. They tend to be more expensive than other options, but can last for 30-50 years and can increase a home’s value when you go to sell. It’s very popular along the Front Range and in the Mountains.

              Concrete and Clay Tile Roofing: Concrete and clay tile roofing are also highly resistant to hail damage and can last upwards of 50 years with proper maintenance. Some clay tile roofs in Europe have last 100’s of years. They are fire-resistant, energy-efficient, and offer a high level of durability and weather resistance. These are also more expensive than traditional asphalt shingles but can last a lot longer, look great and increase home value.  NOTE: As durable as concrete tiles are to weather, a number of Insurance Companies do not recognize a lot of different Tile manufacturers for a Class 4 – Impact Resistant premium discount.  Check with your agent to see if your manufacturer is on the list.

              Composite/Fiberglass shingles: There are a number of new Composite options for a roofing material that are coming onto the market every year.  We are not early adopters of them because we feel like they need to be battle-tested with our weather on the Front Range. Fiberglass shingles are a more affordable option than a Metal Roof or even a Tile Roof. There are a number of different types. They are also resistant to hail damage and lighter material and can last for up to 20+ years with proper maintenance. They are also fire-resistant. They come in a variety of colors and styles, but they may not last as long as the other options. And because they are thinner and lighter than are not really great in colder climates because they provide a little less insulation and can crack in the colder temperatures.

              Architectural Asphalt Shingles: Class 4 – Impact-resistant shingles: Impact-resistant shingles are a popular choice for homes in the Front Range area, as they are specially designed to resist hail damage. These shingles are constructed from a combination of asphalt and a rubber polymer and are rated to withstand hailstones of up to 2 inches in diameter. These shingles are more affordable than Metal or Concrete Tile roofs. And a little more than a traditional Asphalt Shingle. When installed correctly they can last up to 20 or 25 years with proper maintenance. They come in many colors, are Fire Resistant, and are an upgrade to a traditional shingle.  A Class 4 IR Shingle can also get you up to a 25% Discount on your Homeowners Insurance with some carriers.  We at Denny’s Roofing like it so much that we put a Class 4 IR Shingle on almost every new roof we put on. The cost vs value of this product is spectacular.  Ask us more when we come out to take a look at your roof.

              In conclusion, when it comes to resisting hail damage in the Front Range area of Colorado, metal, concrete, and clay tile, composite shingle, fiberglass shingles, and asphalt class-4 impact-resistant shingles are among the best options. Each of these roofing types has its own advantages and cost considerations. While metal, concrete, and clay tile roofing may be more expensive, they have a longer lifespan and can increase the value of your home. Impact-resistant shingles may be more affordable and still offers good resistance to hail damage. Ultimately, the best option for your home will depend on your specific needs, budget, and preferences. It is always recommended to speak with a professional roofing contractor to find out what is the best choice for your home. Give us a call to discuss the options!

              a complete re-roof after a hailstorm

              Why It’s Important to Have Your Roof Thoroughly Inspected After a Hailstorm in Colorado

              Living in the Front Range area of Colorado, residents are no strangers to the powerful hailstorms that can occur in the region. After a hailstorm, it is crucial to have your roof thoroughly inspected, as hail damage can be difficult to spot and may not be immediately obvious if you are not sure what you are looking for. In this article, we will discuss why it is important to have your roof inspected by a professional roofer after a hailstorm in the Front Range area.

              Preventing water infiltration: Even small dents or cracks in your shingles caused by even small hailstones can weaken their ability to protect your home from water infiltration. This can lead to leaks, mold growth, and significant damage to the interior of your home. A professional inspection of your roof will identify any damage that may have occurred and help to prevent water infiltration.

              Identifying hidden damage: Oftentimes, hail damage is not visible from the ground, or the homeowner may not have noticed it. A professional inspection of your roof will be able to identify damage that is not immediately obvious, such as damage to the underlayment or structural elements. This will ensure that any damage is addressed before it becomes more severe. Also, if you see your neighbors getting their roofs inspected or even replaced, there is a good chance that you have some damage too.  Unless you have a new roofing system that is designed to resist hail damage.  They exist now.

              Protecting your investment: A roof is a significant investment for any homeowner. By having your roof professionally inspected and maintained after a hailstorm, you can ensure that it remains in good condition and protects your home for many years to come. This can also help to maintain the value of your home if you decide to sell it in the future.

              Insurance: Many insurance policies have a time limit for homeowners to file hail damage claims, as well as need a professional inspection of the roof. Getting your roof inspected by a professional after a hailstorm can help you to identify damage that is covered by your insurance policy and submit a claim before the deadline.

              Preventing further damage: A roof that is damaged by hailstorms is more susceptible to damage from other weather events such as wind. By having your roof inspected and any damage repaired, you can prevent further damage from occurring and ensure that your roof remains in good condition.

              In conclusion, it is essential to have your roof inspected after a hailstorm if you live in the Front Range area of Colorado. Not only will this help to prevent water infiltration and identify hidden damage, but it will also protect your investment, help with insurance claims, and prevent further damage. Regular roof inspections are an important part of maintaining the integrity of your home, and in the Front Range, it’s especially important after any hail storm.